Category Archives: Technology

Home Automation Update

2017.

As with all things that change, much remains the same.  The past several years have seen an explosion of new products in the “Smart Home” market, yet no clear winner has emerged, resulting in a landscape that is even more fragmented and beset by compatibility issues than ever before.  Whereas 5 years ago one was faced with a choice of several protocols (Z-wave, X10, ZigBee) and control software options (HomeSeer or Vera) or expensive, bundled turn-key solutions like Control4 or Savant, the product offerings are now much more diverse.  Almost every large tech company (Google, Apple, Samsung) and many home appliance stores (Home Depot, Lowe’s) have their own brand-name devices, home automation hubs, and cloud subscription services.  Nothing as ambitious as Google Home (the platform, not the smart speaker they launched this year) has materialized, and because no one ecosystem has gained wide acceptance, the consumer is faced with the unfortunate choice of settling for the limitations of a single ecosystem that may be lacking in certain device modules or software features, or going down an ever more harrowing DIY path and dealing with compatibility issues as they try to integrate products from the above manufacturer’s offerings into a third-party control network, hoping that the underlying protocols are still compatible.

Left with the choice of investing an a single ecosystem that may – and likely will – become obsolete (and unsupported?) within less than a decade, I have decided to stick with the tried and true – HomeSeer and Z-Wave – for the foreseeable future.  While lacking some of the nice flourishes like well-designed mobile apps and effortless compatibility, the endless rule-based configuration and extensibility of HomeSeer offers true Automation where competing “consumer-friendly” products lean more towards glitzy remote-control.

In the past few years, I have added some additional functionality, mostly through software, that has improved the overall experience of my setup.  The mantra is simple: unseen, unheard.  Anticipate, react, but do not interfere or present features that add little value.  What does that look like?

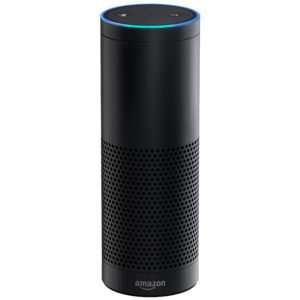
Alexa

My glorified smart alarm clock.  Really.  While the other features are nice, and I do enjoy the occasional customized morning briefing, using the Echo as an alarm clock has made a notable improvement in the daily routine.  With IFTTT integration, Alexa can trigger events in HomeSeer, and trigger phrases can be customized.  I can say, “Alexa, trigger all lights out” to turn every (connected) light in the house out, or “Alexa, trigger air on” to turn on the AC.  Rather than fumbling with a crappy old alarm clock or relying on my phone, I can say “Alexa, set alarm for 5:25 AM” and it is done.  The time is maintained accurately via internet connection, and daylight savings is accounted for.  Better yet, IFTTT can respond to the alarm going off as a trigger.  This allows the lights in my bedroom, hallway, and living room to automatically come on when the alarm goes off, and (optionally) the coffee pot to turn on with a 10min delay for me to finish a shower,  Pretty cool.
Presence

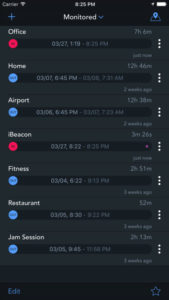
One of the requirements for true home automation is the accurate tracking of presence.  The system must know who is home in order to respond appropriately.  This is actually very difficult to implement, and there are many ways of going about it, including motion sensors, Bluetooth beacons, pinging each household member’s phone while connected to the Wi-Fi network, or using GPS position reporting from an app.  The latter two options offer the additional granularity of knowing WHO is home (assuming they keep their phone with them) and the last option gives the ability to set multiple trigger zones on a map with the goal of anticipating one’s arrival home and thus responding BEFORE they arrive, allowing for heat/AC to already be on, alarms to be disabled, etc.  This is what I have implemented with one of my favorite iOS apps, Geofency.  It allows multiple “Geo-Fences” to be set up, with accurate cell and GPS based tracking of the entry and exit into and out of set geographical regions, with associated trigger actions.  In this case, like with Alexa, IFTTT is used as a bridge to connect with HomeSeer and set “Home” and “Away” status.
Security

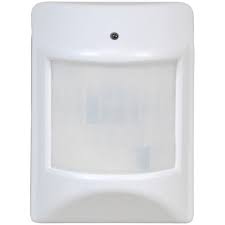
ADT?  pfft.  With no additional hardware, and zero monthly subscription fees, I have an adequate security system by simply utilizing the existing presence features described above with alternative events to be triggered when either of the in-house motion sensors (entryway and stairway) detect motion.  Normally, these are used to turn lights on, but when no one is home, they send an alert text that there is activity in the home.  While I have experimented with cameras, there are just too many false positives (headlights flashing through a window, lightning, birds etc…).  Simple IR sensors are much more reliable at detecting humans and humans only.
HVAC

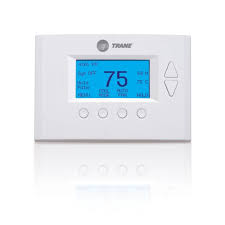
Here is where the cost savings comes in to save the day and pay for all the cool stuff described above.  Presence sensing and a connected thermostat (no, not a Nest, just a simple, dumb, Z-wave thermostat) allow for the heat and AC to be on only when home, and to dynamically react to changing outside weather conditions, bedtimes, and early/late mornings.  The cost savings, especially with air conditioning, is in the range of hundreds of dollars annually.
Conclusion

With the exception of voice control via Alexa, little has changed from the hardware standpoint.  Sure, a few more lights are attached via Z-Wave outlet, thanks to overall lower prices.  Several 4-button Aeon MiniMotes have been added for convenience of turning said lights on and off singly or in groups.  But the rest?  Mostly better software integration.  Better presence detection has enabled a much less distracting level of automation, where the house reacts to certain events reliably and appropriately, but is still able to be overridden manually without hassle.

While the lights don’t change colors and doors don’t lock and unlock themselves, I am happy with this fairly unobtrusive setup until something better comes along.

 

Category: Technology | Tags: , , ,

eBay Bulk Listing for Free with File Exchange

Posted on by 0 comment

eBay’s website has become a cesspool of CPU and Memory intensive Web 2.0 sludge, which makes using it to do anything which benefits from parallelization a nightmare.  Bulk listings?  Pay a third party webapp for the privilege.  Or not.  eBay has an obscure backend involving uploading CSV files to create or edit listings, and even leave feedback in bulk.  You just have to figure it out.

So, here we go:

Selling Workflow

  1. Take photos
  2. In Lightroom, rotate, crop and export <1MB preset
    1. delete originals from disk
  3. FS Viewer fullscreen: F2 Rename
  4. Excel Update Quantities, Pricing
    1. Download current listings
      1. http://k2b-bulk.ebay.com/ws/eBayISAPI.dll?SMDownloadRequest&ssPageName=STRK:ME:LNLK
      2. Active—FileExchange—Revise Price and Quantity—All
      3. Link sent to email
    2. Adjust names, prices
    3. Adjust Quantities
    4. FORMAT Item ID + Transaction ID to number (use format settings menu, change decimal places to 0)
    5. Save, confirm CSV
    6. Upload
      1. http://bulksell.ebay.com/ws/eBayISAPI.dll?FileExchangeUploadForm&ssPageName=STRK:ME:LNLK
    7. Verify (DL report)
      1. http://bulksell.ebay.com/ws/eBayISAPI.dll?FileExchangeUploadResults&ssPageName=STRK:ME:LNLK
  5. Excel New Listings:
    1. Template from “Listed.xls” containing previous listings
    2. Category
    3. Title
    4. Brand
    5. Verify
      1. Condition 1000-New
      2. Format
    6. PicURL-Boxart
      1. hardlink
        1. https://www.google.com/imghp?safe=off&source=lnms
      2. FTP
        1. Use predictable link formatting
      3. dropbox public or imgur (unreliable)
    7. Description (same for all SW)
    8. Price
    9. Quantity
    10. SAVE AS CSV, comma delim
    11. Upload
      1. http://bulksell.ebay.com/ws/eBayISAPI.dll?FileExchangeUploadForm&ssPageName=STRK:ME:LNLK
    12. Verify (DL report)
      1. http://bulksell.ebay.com/ws/eBayISAPI.dll?FileExchangeUploadResults&ssPageName=STRK:ME:LNLK
    13. Copy to Listed for templates

I can post a template for this if anyone is interested.


Feedback Workflow (mark as shipped, positive FB)

  1. Download “sold and not shipped”
    1. http://k2b-bulk.ebay.com/ws/eBayISAPI.dll?SMDownloadRequest&ssPageName=STRK:ME:LNLK
  2. Copy Item ID + Transaction ID columns to sold template.
    1. format Item ID + Transaction ID to number (use format settings menu, change decimal places to 0)
  3. Upload
    1. http://bulksell.ebay.com/ws/eBayISAPI.dll?FileExchangeUploadForm&ssPageName=STRK:ME:LNLK
  4. Verify (DL report)
    1. http://bulksell.ebay.com/ws/eBayISAPI.dll?FileExchangeUploadResults&ssPageName=STRK:ME:LNLK


Category: Technology | Tags: ,

Direct DC Power to Smartphone – No Battery

This seems like it should be simple.  Phones of all variety – Android, Apple, “smart” and “dumb” use 3.7-3.85V single cell lithium-ion batteries.  Just attach a 3.7V DC adapter to the (+) and (-) terminals of the phone and you’re good to go, right?  Wrong.  A bit more trickery is required, and some additional finesse is well worth the effort.

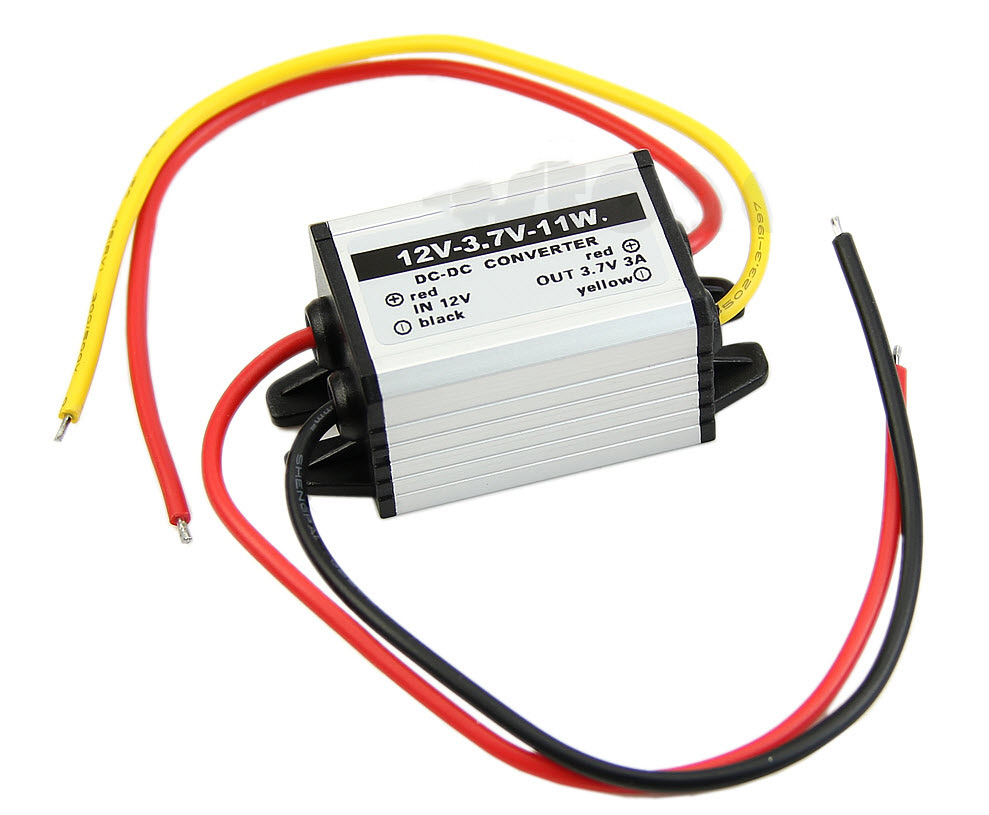
Two things are absolutely essential for this.  First is a DC adapter with 3.7-4.2V output rated at 1.5A or greater.  I used a DC-DC adapter for 12V input and 3A, 3.7V output, available on eBay.  If you don’t mind a bit more work, this step-down converter is fully adjustable by removing the heat shrink and turning a screw (while connected to a multimeter), allowing for 12V input and your choice of <10V output, and is actually what I ended up preferring to use.  An AC adapter may be more convenient, depending on the intended use, though I had a hard time finding an inexpensive option with sufficient output (1.2A was the best I found).  12V AC-DC adapters are cheap and plentiful, so you could always just combine one of those with either of the DC-DC step-down converters from above (which could likely power 2-3 phones in parallel).

2015-07-07_1-40-40

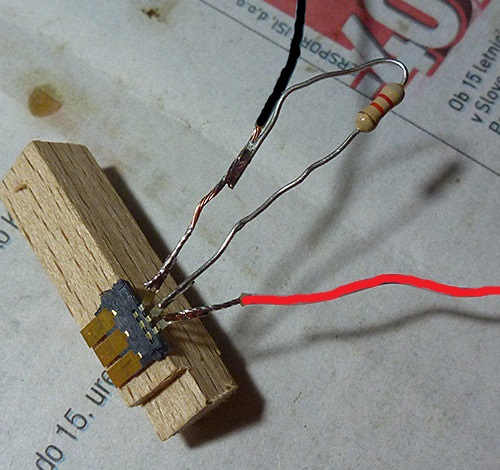
The second item needed is a resistor.  This bridges the ground and BSI (Battery Status Indicator) contact.  If a fourth contact is present, this is likely for NFC, and will be left alone.  For samsung phones, the BSI pin is typically found between the (+) and (-).  The purpose of the resistor is to identify the battery as compatible with the phone and may also assist in reporting the capacity / charge level / temperature.  The 68K resistor I used, plus the 3.7V output from the adapter made my Galaxy Nexus report a battery level of 14%.  I also tried a 100K resistor, which reported a similar, or slightly lower, capacity.  With further testing (using the adjustable step-down converter), it appears that the input voltage of the battery, rather than resistor size, determines the phone’s reported battery level, through a resistor is still necessary for the phone to recognize the battery and power on.  I ended settling on 4.15V, which made the phone report 100%.

FYGRTN8HVC1FEZE.LARGE

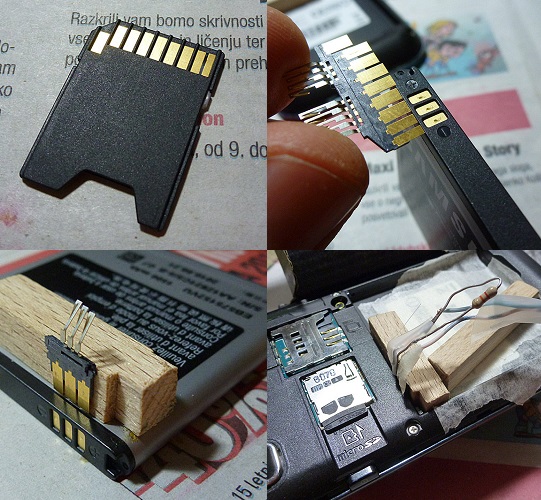
If you want a removable solution, you can construct a “faux battery” using your scrap material of choice and a microSD to SD card adapter – if you’re anything like me, you have an unused one laying around.  There’s a good example of this over on Instructables:

fauxbatt

Of course, you could just solder directly to the contacts on the phone, which may not be a bad idea if the modification will be anything approaching permanent.  The “faux battery” solution can be made quite sturdy, but nothing beats solder for peace of mind.

This solution works great for in-place installations such as home automation remotes, fixed displays and long-endurance photo / video, cellular hotspot and communication uses.  Unfortunately, for a hands-free implementation in a car or similar situation where the phone would ideally boot up when power is connected, additional work will be needed, as simply connecting power – just like inserting a new battery – does not result in the phone turning itself on.  You’d likely need to disassemble the power button and simulate a “momentary press” using capacitors / relays, which is beyond the scope of this post.  I may revisit this topic though, as I constructed such a solution back when I made a CarPC (before Android and cheap tablets were a thing).


Category: Technology | Tags: , , , ,

TK102 Clone – GPS Tracker Setup Guide

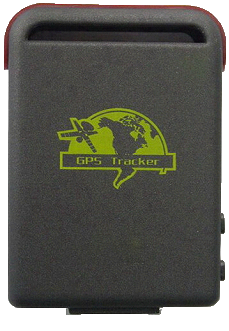
As with most Chinese knockoff and clone devices, one can expect minor variations in hardware, numerous inconsistencies in software / firmware and a complete lack of documentation.  For a device where all commands must be issued over SMS text message, figuring out how the Xexun / ZY International TK102 / TK102B / TK102-II functions without a proper manual is difficult enough, but for my “clone,” the closest to which I’ve come to identifying as a Heacent HC06A board inside a TK102 shell, in which the formatting of the commands has inexplicably been altered, the task was a miserable one.

SupportedDevs_1

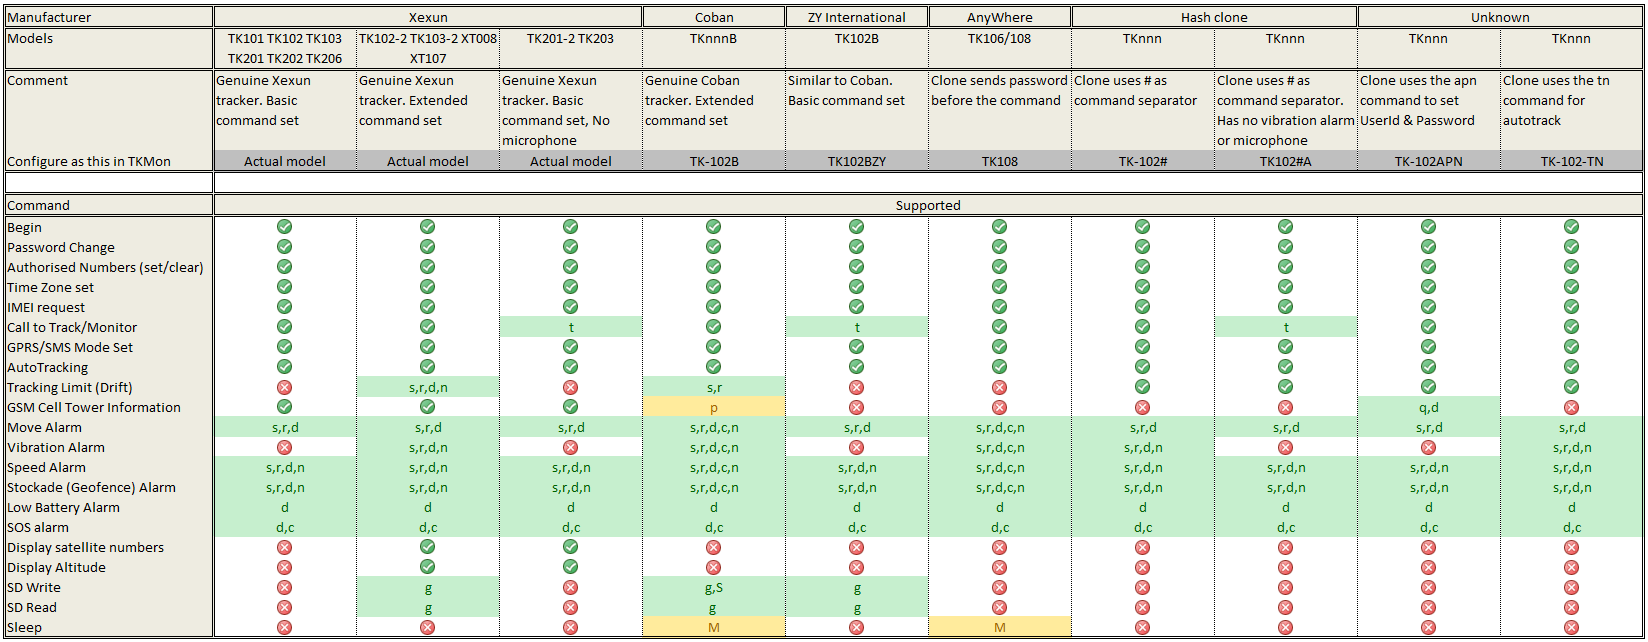
Mine resembles the “Hash Clone.” Click for the key and link to the source, the developer of an android app for these trackers.


That said, at $27.97, this type of hassle is almost expected, and for a fully functioning (once understood) GPS / GSM tracker, the lack of documentation does little to spoil the deal.

The Elusive list of Commands

For this device, the commands use “#” for padding/separations, rather than a space as on the official devices and many of the, er, “more official” clones.  The commands also vary slightly.  As with the original, all passwords must be numeric only, and six digits.  The default is “123456.”  Here is what I have gotten to work:


Function SMS Command SMS Response Notes
Initialization #begin#123456# begin ok resets password
Change Password #123456#123456#987654# password ok
Get IMEI #imei#123456# imei:123456789000015 15 digits
Set Timezone #timezone#123456#S0400# time ok S equals negative?
Set APN #apn#123456#epc.tmobile.com#user#pwd# apn ok user and pwd are optional
Set Server IP #adminip#123456#193.193.165.166#20751# adminip ok IP and port (IP can be a url)
Remove IP #noadminip#123456# noadminip ok Limit 1 IP / Domain?
Admin Number #admin#123456#18001234567# admin ok need country prefix
Remove Number #noadmin#123456#18001234567# noadmin ok Can store 5 numbers
Admin SMS #adminsms#123456#18001234567# sms ok Can store 5 numbers?
Remove SMS #noadminsms#123456#18001234567# noadminsms ok
Check Status #check#123456# electricity:24.97% GPS:A gprs:open gsm :75 A= fix ; open=online
Google Maps link #smslink#123456# http://maps.google.com/?q=N41.000000,W87.000000
Auto Track #fix#030#004#123456# set fix ok interval (<20) # total (<255)
Auto Track-alt #fix#030s#004n#123456# set fix ok s: second, m: minute, h: hour
Stop Auto Track #nofix#123456# Cancel fix time ok!
Listen to Microphone #monitor#123456# monitor ok Call to listen to mic
Back to default mode #tracker#123456# tracker ok Switch back to normal mode

From the various sources I pieced this together from, I still couldn’t figure out the following issues:

  1. Admin phone number: Requires an international prefix (eg +1 for the US).  The example they list is for China (+86), which is formatted as 0086.  Unsure how many zeros should precede the “1” for US.  I’m also not sure a prefix is even needed unless you’re calling from out of the country.
  2. The “Auto Track” position updates don’t seem to be sent via SMS, only GPRS when a server is configured.  Not sure if that’s because I incorrectly whitelisted my number or if I never tried with GPRS disabled.
  3. I tried a bunch of free android apps; none worked with this clone; they don’t like the “#”s.  This app looks like it would work, but it is $10.  I’ll just use Tasker.
  4. The :Low Battery Alert” supposedly begins to alert at 3.7V and sends you SMS in 30m intervals thereafter. In my experience, “Low” is about 60%.
  5. Several commands I did not mention above or test, but which should work:


Function SMS Command SMS Response Notes
Geo-fence #stockade#123456#500#60#22. 312451#113.54376# stockade+geo-info radius#time#longitude#latitude
Disable Geo-fence #nostockade#123456#
Movement alert #move#123456# move+geo-info Must be still during setup
Disable Movement alert #nomove#123456# move ok
Overspeed alert #speed#123456#080# speed ok km/h; not less than 20km/h
Disable Overspeed alert #nospeed#123456#

For the Geo-Fencing, apparently there’s a way to either set a coordinate and diameter, or to use two coordinates, where the first defines the top left corner of the box making up the geo-fence, and the second is the coordinate of the bottom right corner.

Now, Make it Pretty…

Finally, here is how to get the GPRS / data connection set up using GPS-Trace.com

  1. Register at this website: http://gps-trace.com/
  2. Setup your GPS with the following configurations (remember to leave the GPS tracker outdoors with clear view of the sky):
    1. If you have not already set up your GPS password:
      1. Send SMS command: #begin#123456# (you should receive an SMS saying “begin ok”)
      2. Make a phone call to the SIM card you put in your GPS (you should receive info such as geographic coordinates);
    2. Send SMS command: #imei#123456# and save your IMEI for later.
    3. Send SMS command: #timezone#123456#S0300# (this is the setting for GMT -3, Brazilian time);
    4. Send SMS command: #adminip#123456#193.193.165.166#20751#
      1. This is for setting the correct IP and port to work with gps-trace
  3. On gps-trace.com, considering you’ve already registered your account, you should now add a new unit – must use “Vehicle”
    1. Look for the “new unit” icon placed on the bottom right side of the screen
    2. Fill the “unit name” field with a name of your choice
    3. Fill in the phone number in international format (“+1” prefix for US)
    4. In “device type” choose “Heacent HC06A”
    5. Fill the IMEI field with your device’s IMEI number (15 digits)
    6. Fill the “password” field with your device’s password (default is 123456)

Now both the Auto Track and individual polling options (smslink and simply calling the device) should also result in a transmission to gps-trace with your coordinates mapped and timestamped.  Theoretically, the above method could be adopted with any online service, or hosted oneself with something like GPS-Gate.

c8ab2848-6466-6241-e541-dc493b82b49d

The TK102B…or a not-so-identical clone.

Or Make it Yours

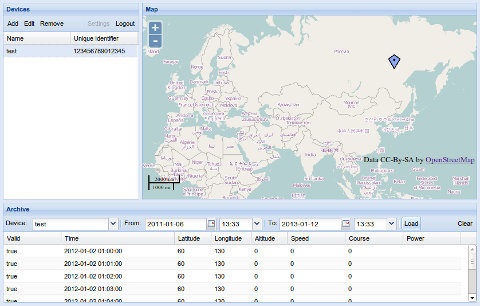
As an alternative to GPS-Trace Orange, I have actually found Traccar, and more specifically, the Traccar-Web UI modification to offer the best blend of features, simplicity and the ability to export data for use in google Earth or similar.  You can either create an account and use the free demo server each of these projects maintains, or download and host your own server, which is what I did.  This allowed me to watch the connection log as my tracker attempted to send data, make sure it was actually connected, and figure out which port it should use.  Traccar uses ports 5000-5100 based on the format of the data the GPS tracker sends, as each is formatted differently.  The HC06A / TK-102 clone, for example, sends a HEX string that converts to “#123456789000015##1#0000#AUT#01#31041001a4776d #8312.534700,W,4120.236900,N,0.00,0.00#060715#212609.000##”.  It’s sending the IMEI, lat/lon, date and time as well as some other stuff I couldn’t decipher.  If this is sent to Traccar on port 5016, it is able to correctly parse the data and display it on a map.

traccar

Traccar. The UI modification adds several additional features, including import/export.

So, to adapt the above instructions for GPS Trace Orange if you prefer to use Traccar instead, simply change the IP and Port to reflect this.  For the Traccar demo server, this would be:  #adminip#123456#104.43.219.242#5016# or alternativly the UI-Mod server is #adminip#123456#188.166.50.6 #5016# .  You can also use your own server, such as #adminip#123456#innominatethoughts.com#5016#.  Using text for your domain does indeed work, rather than needing to use the IP, which is great if you’re using a dynamic IP with DDNS.  Whichever version of Traccar use, you’ll need to create an account, add a device, and use the IMEI as the “unique identifier.”

Category: Technology | Tags: , , , ,

Guide: Note 3 flash to PagePlus with 3G data

Well, that didn’t last long.  After finally getting my Galaxy Nexus flashed to PagePlus and up and running with 3G data, I thought I’d be set for a while.  Then it finally hit me: the galaxy nexus is a piece of crap.  Even when released, it was the result of a 3-way compromise between Google, Samsung and Verizon with the loser being the customer.  Now that it’s pushing 3 years old, retirement is all too gentle a fate.

The Samsung Note 3 is currently the best specced phone available running Android.  It’s also the most expensive.  Fortunately, PagePlus users tend to be frugal, and I’m no exception. I took a chance on a used Sprint Note 3 with a bad ESN (doesn’t matter if flashing it to verizon) and a “Locked SIM.”  A few dings around the bezel (but not a scratch on the screen) only sweetened the deal further.  I made away like a bandit, getting this flagship phone for half its MSRP and nearly the same price as phone subsidized on a 2-year contract.  I just had to make it work.

While this guide follows my adventure with the Note 3, I am trying to make it as generic as possible for flashing any Qualcomm-based phone (Note 1/2/3, S1,S2,S3,S4, HTC One etc…) to PagePlus using DFS.  There are many variables at play here, and some steps may vary by phone, but the overall process should be accurate.  For instance, you may get away using different Radios, PRLs and donor phones than I used.  Then again, you may not.  I’ll do my best to accommodate this.  If all the HA, AAA, MEID, PRL, MSL, SPC jargon is confusing you, check out the end of this post.  I did my best to pass on what I learned.

Prepare your PagePlus Account

  1. Register your phone with PagePlus.  I chose to go through Kitty Wireless, an authorized dealer, as they will take care of monthly billing with the 1200 Plan.  I’m also a member of the Level 2 “Crazy Kitty PIN Rebate Club ” which gives a discounted rate on plans – $26.97/mo vs $29.99/mo – it adds up over time, especially with multiple lines.  This club is only offered at select times during the year, and costs a one-time fee of $100 to join.
  2. Make sure to supply the MEID correctly when your register your device – you need to remove the last digit (because it is 4G capable) for the order to go through.  For example,mine was 990000xxxxxx223.  I supplied 990000xxxxxx22.  Should end up being 14 digits instead of 15.
  3. Wait for the order confirmation email.  You’ll need the following: Phone # (MDN) MIN (MSID), and SID.  For the SID, you need to call PagePlus at 800-550-2436.  Expect to wait a while.
  4. You may or may not need a SIM card.  Furthermore, that SIM card may or may not need to be from Verizon, and it may or may not matter whether it has already been activated.  This totally depends on your phone.  For the Sprint Note 3 that I used, a SIM card was unnecessary.  The verizon model of the same phone however often requires one.  This will require some googling on your part.
  5. For 3G data (upload / download speeds >1mbps, ping <200ms) you will need a “Donor Phone”.  This can be any Verizon dumbphone (that supports 3G) or any 3G ONLY smartphone.  You may already have one in a drawer somewhere.  If not, do a quick google search to make sure the one you are buying is compatible with DFS or CDMA Workshop.  I used a Samsung Convoy (SCH-u640).
    1. You may skip this step, but you will be limited to 1X data (upload/download speeds of 0.1mbps, and most painful – pings of 700-1200ms).
    2. Note: you may also be able to get away with a Sprint phone as a donor, but lets not complicate things, shall we?  Phones are cheap on eBay. 

Ready your Computer

  1. Download this file (45.2MB).  It contains several files necessary for the process.
  2. Install the 32-bit or 64-bit USB drivers for your phone (not provided)
  3. Download DFS from: http://www.cdmatool.com/download.  Make sure you get DFS and not iDFS.  Install it and create an account – you can get by with the Demo version just fine.
  4. Use the 60008 PRL provided (recommended) or download one here.

Preparing to Flash

Your phone may need to be rooted and/or have an unlocked bootloader.  More importantly, make sure you have the latest ROM of your choice installed before flashing, and MOST importantly, ensure that the baseband / modem (check this in settings / status) is compatible with flashing to PagePlus or your desired MVNO.  I will go through this in the case of the Sprint Note 3 (SM-N900P):

Part 1 – Update Android / ROM, obtain Root, flash Modem

  1. As always, it is a good idea to make a full backup before starting.
    1. TWRP recovery is easy to install via the free goomanager app
  2. I grabbed the latest official (TouchWiz) build of Android 4.4.2  KitKat: N900PVPUCNAB and installed it using Odin 3.09.
  3. Unfortunately, the NAB modem that is installed with this update is not compatible with PagePlus.  No problem, we now just have to flash an earlier version of the modem ONLY (again using Odin just as before), which you can find in the download above (modem.tar).
  4. We can then Root android, again using Odin and loading “CF-Auto-Root-hltespr-hltespr-smn900p”.
  5. This is a good time to disable the pesky KNOX security software, though this step is not necessary for flashing.
  6. Make another backup of your shink new 4.4.2 ROM

Part 2 – Set USB mode to MODEM

  1. Enable USB Debugging.  Settings –> About Phone –> Tap “Build Number” 7 times to enable the development menu.  Then go to it (Settings –> Development) and make sure Enable USB Debugging is checked.
  2. Enable “Install apps from unknown sources” in the security settings.
  3. Install Samsung Android SPC Utility (apk provided) and press “Read SPC” – write this down.
  4. Dial ##3424# (DATA) to enter the PhoenUtil menu, and change the Qualcomm USB Setting to DM+MODEM+ADB or RMNET+DM+MODEM – either will work.
  5. The phone is now ready for flashing.

Reading settings with DFS

Before we start, we need one last password.  For Samsung devices, check here.  The 16 Digit Password that worked for my Sprint Note 3 was 2012112120131219.

DFS – READ; do NOT click write on anything yet

  1. Make sure the SIM card is removed.
  2. Turn on phone and connect to USB – ensure drivers are detected and installed.
  3. Start DFS.  Open “Ports”, select the COM port belonging to the phone.
  4. DFS should establish a connection and read the status and diagnostic info.
  5. Enter your SPC and click the button (log should indicate “UNLOCKED”)
  6. Enter your 16-digit password and click the button (log should indicate “UNLOCKED”)
  7. Go through each section of the equipment and programming tabs and click READ for each subsection.  Then MAKE SCREENSHOTS of your default values.
  8. Go to programming –> General and copy your MEID (14 digits HEX; ignore the two digits in the second box if present)
  9. Turn OFF your phone.  This is important.

Flashing Donor Phone / Obtaining HA, AAA Keys

Put aside your POWERED OFF phone and grab the donor.  Do NOT EVER have the two of these devices powered on at the same time with the same MEID (which they will have shortly).  This would be illegal according to the FCC.

DFS – Flash the donor

  1. Connect your donor phone to your computer and open DFS.
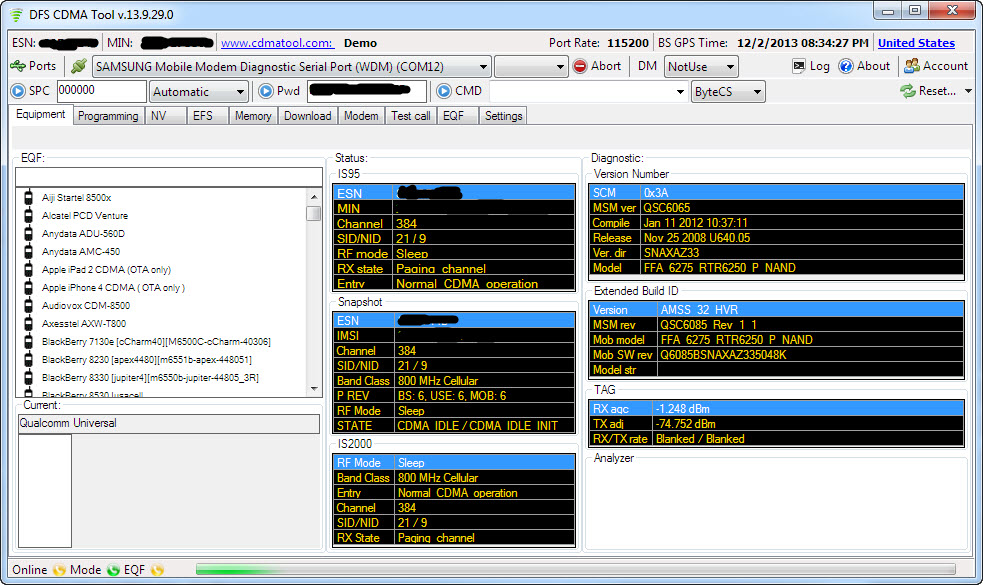
  2. Establish a connection with your phone.  Click Ports, and select the COM interface you donor is connecting on.  This will vary by model.  Here’s what mine looked like:DFS Connected to Samsung Convoy (SCH-u640) - click to enlarge.
  3. Send the SPC code (mine was 000000).  Yours probably is too.
  4. Send the Pwd (mine was 2008110120090528).  This is unique to the model of phone.
  5. Go to the Programming / General tab and READ your MEID.
  6. SAVE THIS – you will want to restore it after finishing.
  7. Write the MEID from your Note 3. (and READ it back to verify it stuck).
  8. Reboot your donor phone and follow the prompt to activate it (or dial *228).  It will now have your PagePlus phone number and should be fully functional.  You have switched phones on a CDMA carrier without having to call support to perform an ESN change.  Epic win.
  9. Verify the 3G icon is present and do something that uses data (mobile web, send an MMS).  This will just ensure the AAA and HA keys are updated.
  10. Connect the donor back to DFS and send the SPC and Pwd again as before.
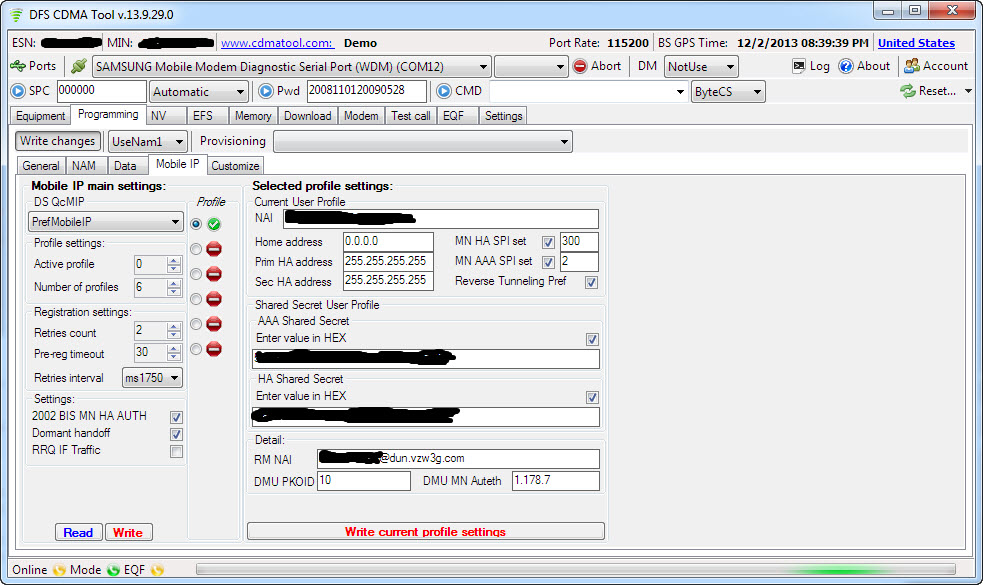
  11. Go to the Programming / Mobile IP tab and copy the AAA and HA Shared Secrets in HEX format.HA and AAA Shared Secrets
  12. Go back to Programming / General and restore the original MEID.  Read it back to ensure it was written, and reboot or shut off the donor phone.  Its job is finished.

Flashing your Note 3 (or whatever)

Make sure you have your backups / screenshots of original settings!

DFS – Now you can WRITE

  1. Make sure the SIM card is removed.
  2. Turn on phone and connect to USB – ensure drivers are detected and installed.
  3. Start DFS.  Open “Ports”, select the COM port belonging to the phone.
  4. DFS should establish a connection and read the status and diagnostic info.
  5. Enter your SPC and 16-digit password
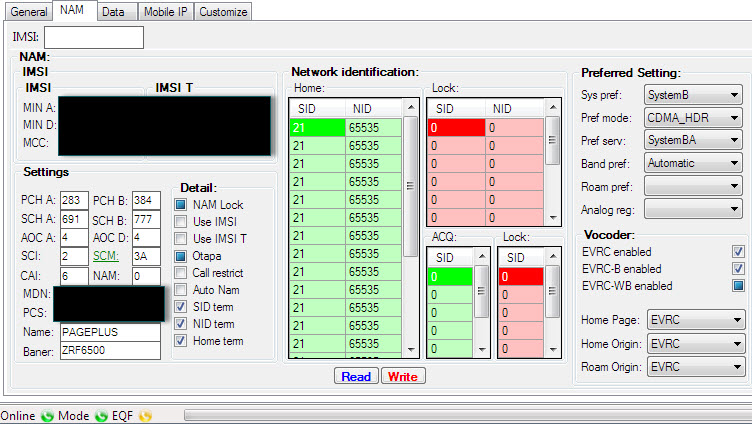
  6. In Programming / NAM, write the following:
    1. IMSI (leave IMSI T unchanged)
      1. MIN A and MIN D = your MIN / MSID (not phone number)
      2. MCC = 310; MNC=00
    2. Enter your MDN into both the SPC and MDN fields
    3. Set your SID (NID should be 65535)
    4. Check the remaining boxes to match this and then click WRITE:
      DFS: Programming / NAM

      DFS: Programming / NAM

  7. In Programming / Data, write the following:
    1. PPP
      1. SIP NAI: “Your MDN”@dun.vzw3g.com
      2. UID: “Your MDN”@vzw3g.com
      3. PWD: vzw (box unchecked)
    2. HDR AN
      1. NAI: “Your MDN”@vzw3g.com
      2. PWD: vzw (box unchecked)
    3. HDR AN Long
      1. UID: “Your MDN”@vzw3g.com
      2. PWD: vzw (box unchecked)
    4. I will make a brief note here to remark that some of these values were erased when changing the baseband on my phone (which I did out of order of this guide) and I ended up with this.  It still worked (and I have learned not to mess with things that are working).
    5. Check the remaining boxes to match this (Hybrid preferred can be Enabled):
      DFS: Programming / Data

      DFS: Programming / Data

    6. Click WRITE
  8. In Programming / Mobile IP, write the following:
    1. Under profile column:
      1. Select the first bubble and make active (Right click, enable profile)
      2. Make sure all other profiles are Disabled (Right click, Disable profile)
    2. Under Mobile IP main settings
      1. DS QcMIP: PrefMobileIP
      2. Active profile: 0
      3. Number of Profiles: 1
      4. Retries count: 2
      5. Pre-Reg timeout: 30
      6. Retries interval: ms1750
      7. 2002 BIS MN HA AUTH: checked
      8. Domant handoff: checked
      9. PRQ IF Traffic: unchecked
    3. Click WRITE
    4. Under Selected profile settings
      1. NAI: “Your MDN”@vzw3g.com
      2. Home address: 0.0.0.0
      3. Prim HA address 255.255.255.255
      4. Sec HA address 255.255.255.255
      5. MN HA SPI set: Check box; 300
      6. MN AAA SPI set: Check box; 2
      7. Reverse Tunneling pref: Check box
      8. AAA Shared Secret
        1. Enter 32-digit value in HEX: Check Box
      9. HA Shared Secret
        1. Enter 32-digit value in HEX: Check box
      10. RM NAI : “Your MDN”@dun.vzw3g.com
      11. DMU PKOID: 10
      12. DMU MN Auteth: 1.178.7
    5. CLICK ON ” Write current profile settings” – do this 2x to make sure everything stuck
  9. Finally, lets go back to Programming / NAM, and write the PRL:
    1. First READ and then SAVE your current PRL
    2. Then LOAD and WRITE the 60008 PagePlus PRL
    3. The radios will reboot/reset after doing this
  10. Done!  Click Reset in the top right, and restart phone!
    1. Disconnect from DFS and unplug your phone.

Finishing Touches

  1. Once phone is restarted:
    1. Dial ##3282# click Edit Mode
    2. Enter your MSL / SPC code
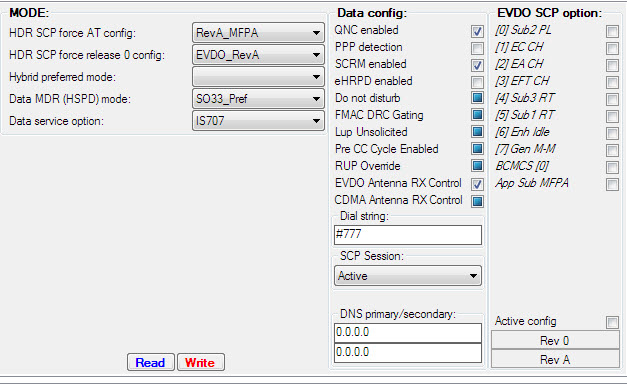
    3. Click on EVDO then Click on DDTM and make sure it is Enabled. Then hit okay and then hit the back key
    4. Click on eHRPD and set to Off then hit ok.
    5. Click on LTE and Disable that also, and click ok.
    6. Youtube streaming and MMS:
      1. Click Multimedia then click on RTSP/HTTP
      2. RTSP proxy ip: 0.0.0.0
      3. RTSP proxy port: 0
      4. HTTP proxy ip: 0.0.0.0
      5. HTTP proxy port: 0
    7. Then click on MMSC menu item
      1. Name: PP (whatever you want)
      2. MMSC: HTTP://MMS.VTEXT.COM/SERVLETS/MMS or http://mms.vtext.com/servlets/mms?X-VZW-MDN=PHONENUMBER
      3. MMS Proxy: Leave Blank or 0.0.0.0
      4. MMS Port: 80 or 8080
      5. MMS Protocol: WAP 2.0
    8. Done!  Reboot phone
  2. Verify you can connect to PagePlus (*611) and that you have an EVDO Rev. A data connection.  Use Speedtest to verify 3G speeds / ping.
  3. Remember – NEVER dial *228 or any of its variations unless you wish to repeat all of the above steps again.

Troubleshooting

Call PagePlus at (800) 550-2436 and verify your ESN / IMEI is correct and in their system.  I had mistyped a digit in mine when flashing the Galaxy Nexus and spent hours trying to figure out why it wasn’t working before realizing it.

3G not working?  Try the following:

  1. Make sure you followed the flashing guide closely.
  2. Your Profile 0 and/or Profile 1 AAA key may be wrong.
  3. You may have wrong APN settings.
  4. Phone network should be set to CDMA. Go to System Settings, More Settings, Mobile Networks, Network Mode should be set to “CDMA”
  5. Try using your AAA password instead of “vzw” in the NAM settings (check the box when entering in HEX).

If all else fails…Nuke it from orbit.  Use Odin to do a full wipe and reflash to stock android and start anew.

F.A.Q

What are all those acronyms?

PRL = Preferred Roaming List – essentially a list of towers for the device to use to prioritize communication. Because PagePlus uses Verizon’s towers, a Verizon PRL is needed.

MEID = Mobile Equipment Identifier – Kind of like a MAC address.  This is what your carrier uses to identify your device. Some devices have it listed on the sticker under the battery, while others will have MEID HEX listed instead and will need to be converted to DEC using a MEID Converter. (DEC Example 268435456123456789) (HEX Example A000000A1B2C3D).

MSID = Mobile Station ID – a number that is associated with the home service provider and the wireless phone number. This is reprogrammed when the user changes home service providers. It can also be called the mobile identification number (MIN) and is not to be confused with the mobile device number (MDN) in the CDMA world, which is the device’s telephone number.

MIN = Mobile Identification Number – a unique number associated to your account, using the same area code of your locale. It is required to program your device.

MDN = Mobile Directory Number – your phone number with the area code.

SPC aka MSL – a 6-digit code used to access the programming features of your device. All Verizon devices use 000000 as the SPC code, which makes flashing very easy usually. Sprint devices use a unique code for each device and they can be quite a task to obtain.

HA Shared Secret – A carrier-specific key required to establish a data connection.  Necessary, but not sufficient to get 3G data.

AAA Shared Secret – A device-specific key required to establish a 3G data connection.  This key is unique to each device and is tied to the HA and MEID.

Your thirst for knowledge still unsatisfied?  Check out the FAQ and Manual for DFS.

Oh, and the Galaxy Nexus… it will likely be slimmed down to the bare minimum of essential software and repurposed as a glorified remote control for HTPC / Home Automation use.  Good riddance.

Category: Technology | Tags: , , , ,

3G Data on PagePlus with Donor HA and AAA

Victory at last.

Victory at last.

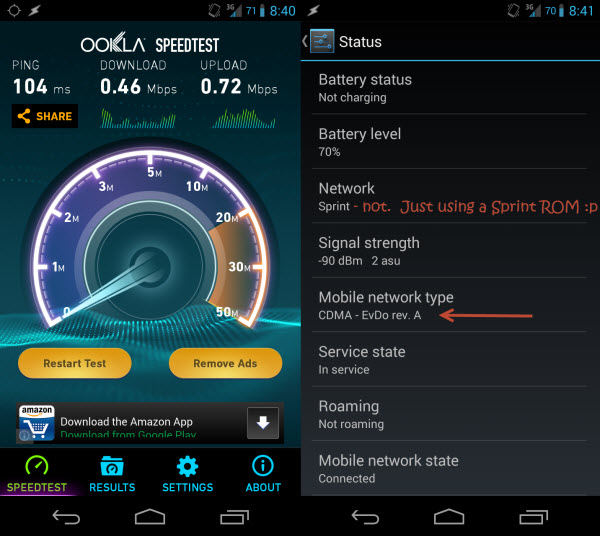
Finally.  I have been using PagePlus for 3 months now.  After writing my guide on how to flash the Samsung Galaxy Nexus to Verizon’s only decent MVNO, I thought I was set.  I had Voice, SMS and MMS all working.  I was able to get a data connection, and the 3G icon was present in the statusbar, proclaiming a job well done.  Perhaps it was just because I hadn’t bothered trying a data-intensive app like Pandora or YouTube, but it took reading one of the comments on my blog to alert me to the fact that the 3G icon was a lie.  An impostor.  I had only been getting 1X data, which became evident as soon as I fired up speedtest while practically standing next to the nearest cell tower: I gasped in horror at the 700-1200ms pings, and upload/download speeds that never passed 0.15Mbps.  Back to the drawing board.

One month and several dozen fruitless attempts later, and I did it.  The process was very…enlightening.  I’ll do my best to provide a guide based on the sources I found and pieced together as well as the actions I took.  But first, the glorious proof:

Unlike the devious 3G Icon, the status page in Settings doesn't lie.  Nor does Speedtest.

Unlike the devious 3G Icon, the status page in Settings doesn’t lie. Nor does Speedtest.

And now for the guide.  Unfortunately, there are many more variables at play here than in my first guide, and I’m not sure that all are important.  For instance, you may get away using different Radios, PRLs and donor phones than I used.  Then again, you may not.  I’ll do my best to accommodate this.  If all the HA, AAA, MEID, PRL, MSL, SPC jargon is confusing you, check out the end of this post.  I did my best to pass on what I learned.

I’m also going to assume that you’ve already read my first guide.  If not, I suggest you at least skim it over before starting here – I’ll be referencing it several times so as not to have to duplicate my efforts.

Getting Ready

  1. Head over to my first walk-through, Guide: Galaxy Nexus on PagePlus, and proceed through it until you have completed Step 18.  At this point you will have flashed everything needed to get Talk, Text and 1X data on PagePlus.
    1. If you are using a Verizon Galaxy Nexus, I suggest flashing a Sprint CDMA Radio followed by a Verizon LTE Radio, as suggested here.  I used the only LTE (toro4.0.4_IMM76K_radio_lte.zip) radio, as well as the FH05 CDMA radio (toroplus_for_toro-FH05-cdma_radio.zip) provided here.
    2. I’d also grab the i515 3G patch (the FH05 version) from here if you plan to use a Verizon ROM.  You may instead opt to use a Sprint ROM (as I did), but you will need to make the following change to the ROM’s update.zip file so that it will install – the recovery will show a “status 7” error if you try to install a ROM to the wrong device.  In our case, the toro (Verizon) and toroplus (Sprint) versions of the Galaxy Nexus are compatible; the installer just doesn’t know it.
      https://www.traditionrolex.com/17
      1. On your PC, open the update.zip for the ROM you downloaded and navigate to \META-INF\com\google\android\.  Open updater-script in a text editor and change all instances of “toroplus” to “toro”.  It will now install.
  2. Download DFS from: http://www.cdmatool.com/download.  Make sure you get DFS and not iDFS.  Install it and create an account – you can get by with the Demo version just fine.
  3. Copy the following two scripts from AutoPrime’s post on XDA:
    1. READ MSL / DATA PROFILES / PASSWORDS
    2. VERIZON/PAGE PLUS 3G FLASH

Now…the phone(s)

You need to have your Verizon donor phone (any 3G smart/dumb phone), its drivers, and DFS installed.  You also need to exercise some google-fu to get the SPC code and 16-digit security password for your donor phone.  Finally, you need ETS installed and working with the Galaxy Nexus.

Part 1 – Reading your Nexus’ MEID, HA, AAA

  1. Open ETS.  Using the same method as in my first guide, open the script utility and run AutoPrime’s “READ MSL / DATA PROFILES / PASSWORDS” script.  No modifications are needed for this one.
  2. Verify it has successfully run and found your MEID, HA and AAA keys.
  3. Once complete, SAVE THE OUTPUT.  If anything goes wrong later on, you can use this data to restore your phone back to its original state.
  4. Copy the MEID (14 digits; ignore the 0x00 part at the start), and grab your Donor phone.

Part 2 – Flashing the Donor, and getting your HA and AAA

  1. TURN OFF your Galaxy Nexus.  We are about to clone its MEID (sketchy legal territory) and you do not want two devices with the same MEID trying to connect to Verizon at the same time.  LEAVE IT OFF until we have finished this part.
  2. Connect your donor phone to your computer and Open DFS.
  3. Establish a connection with your phone.  Click Ports, and select the COM interface you donor is connecting on.  This will vary by model.  Here’s what mine looked like:
    DFS Connected to Samsung Convoy (SCH-u640) - click to enlarge.

    DFS Connected to Samsung Convoy (SCH-u640) – click to enlarge.

  4. Send the SPC code (mine was 000000).  Yours probably is too.
  5. Send the Pwd (mine was 2008110120090528).  This is unique to the model of phone.
  6. Go to the Programming / General tab and READ your MEID.
  7. SAVE THIS – you will want to restore it after finishing.
  8. Write the MEID from your Galaxy Nexus. (and READ it back to verify it stuck).
  9. Reboot your donor phone and follow the prompt to activate it (or dial *228).  It will now have your PagePlus phone number and should be fully functional.  You have switched phones on a CDMA carrier without having to call support to perform an ESN change.  Epic win.
  10. Verify the 3G icon is present and do something that uses data (mobile web, send an MMS).  This will just ensure the AAA and HA keys are updated.
  11. Connect the donor back to DFS and send the SPC and Pwd again as before.
  12. Go to the Programming / Mobile IP tab and copy the AAA and HA Shared Secrets in HEX format.
    HA and AAA Shared Secrets

    HA and AAA Shared Secrets

  13. Go back to Programming / General and restore the original MEID.  Read it back to ensure it was written, and reboot or shut off the donor phone.  Its job is finished.

Part 3 – Flashing your HA, AAA to the Galaxy Nexus

  1. Modify AutoPrime’s “VERIZON/PAGE PLUS 3G FLASH”
    script with your HA and AAA keys as instructed.

    1. You will need to add a ” 0x” in front of each 2-digit segment of the 16-digit AAA and HA keys.  For example:
      1. Change this: 45C7A893C22AA30C45C7A893C22AA30C
      2. To this: 0x45 0xC7 0xA8 0x93 0xC2 0x2A 0xA3 0x0C0x45 0xC7 0xA8 0x93 0xC2 0x2A 0xA3 0x0C
  2. Make sure the MEID is the same as before (you’re NOT using the donor MEID).
  3. Flash it.  Reboot.
  4. Continue on with my first guide to install your ROM of choice.
    1. Resume at step 19.  It likely doesn’t matter, but I used this PRL instead of the one in my first guide.  Despite the warning, I do have a Verizon phone and it worked fine.
    2. You can skip step 21 if using a Sprint ROM as discussed above.
    3. STOP before step 23.  NEVER dial *228 or any of its variations.  To be safe, update your PRL manually.
  5. Verify 3G is working in Settings –> Status (should say EvDo rev. A rather than 1xRTT as before).  Run Speedtest.  Rejoice!

F.A.Q

What are all those acronyms?

PRL = Preferred Roaming List – essentially a list of towers for the device to use to prioritize communication. Because PagePlus uses Verizon’s towers, a Verizon PRL is needed.

MEID = Mobile Equipment Identifier – Kind of like a MAC address.  This is what your carrier uses to identify your device. Some devices have it listed on the sticker under the battery, while others will have MEID HEX listed instead and will need to be converted to DEC using a MEID Converter. (DEC Example 268435456123456789) (HEX Example A000000A1B2C3D).

MSID = Mobile Station ID – a number that is associated with the home service provider and the wireless phone number. This is reprogrammed when the user changes home service providers. It can also be called the mobile identification number (MIN) and is not to be confused with the mobile device number (MDN) in the CDMA world, which is the device’s telephone number.

MIN = Mobile Identification Number – a unique number associated to your account, using the same area code of your locale. It is required to program your device.

MDN = Mobile Directory Number – your phone number with the area code.

SPC aka MSL – a 6-digit code used to access the programming features of your device. All Verizon devices use 000000 as the SPC code, which makes flashing very easy usually. Sprint devices use a unique code for each device and they can be quite a task to obtain.

HA Shared Secret – A carrier-specific key required to establish a data connection.  Necessary, but not sufficient to get 3G data.

AAA Shared Secret – A device-specific key required to establish a 3G data connection.  This key is unique to each device and is tied to the HA and MEID.

Why is this such a pain?

Several reasons.  First is the fact that Verizon is using a somewhat screwy hybrid authentication system for 3G data.  Because PagePlus is forbidden on Verizon’s 4G network, we can’t simply dial *228 to program our phones like users of 3G-only devices can.  Second, the Galaxy Nexus’ Verizon radios are not user-programmable (ie. ETS can’t write them).  Thus, you need to use a Sprint CDMA radio which is programmable.  Finally, the modem in the GNex is manufactured by VIA.  This isn’t bad in itself, but there are many more polished tools and guides for phones using the more popular Qualcomm chips.

Can I use CDMA Workshop?

CDMA Workshop is an alternative to DFS.  Can you use it to extract the HA and AAA keys?  Sure.  I won’t go into the process in detail, but basically you are looking to read the read the NV Items 465, 466, 1192, 1194 from the donor phone’s memory, which contain the HA and AAA.  The process is slightly more messy – I preferred DFS.

Special Thanks: the Breadcrumbs

This blog post on gPost: http://www.groovypost.com/howto/epic-4g-on-virgin-mobile/

This guide: http://www.cricketusers.com/page-plus-cellular/38824-page-plus-3g-data-speeds-how.html

AutoPrime’s scripts for ETS: http://forum.xda-developers.com/showpost.php?p=27080787&postcount=3

DFS guide: http://androidforums.com/boost-mobile-warp-all-things-root/532142-guide-how-change-your-msl-prl-not-cdma-workshop.html#post4229851

Some hints from DX///M: http://forum.xda-developers.com/showpost.php?p=47676417&postcount=559 and http://forum.xda-developers.com/showpost.php?p=47658678&postcount=556

Some posts in this thread: http://forum.xda-developers.com/showthread.php?t=1900163

This entire thread: http://forum.xda-developers.com/showthread.php?t=2060085

Aaaaaand this one: http://forum.xda-developers.com/showthread.php?t=1913738

Category: Technology | Tags: , , , ,

Space Heater Controlled by Z-Wave Thermostat

A Case Study in Home Automation

In lieu of actually writing a more comprehensive post about my foray into home automation, I decided to begin instead with something more simple: a problem, and its overly-complicated, but totally awesome solution.

My bot-so-smart source of warmth.

My not-so-smart source of warmth.

I currently depend on this heater to keep my basement dwelling habitable.  While the furnace that heats the upper levels sends a token amount of semi-warm air in my general direction, it doesn’t seem too concerned with my comfort.  So, like most people in this situation, I use a glorified toaster to stave off hypothermia.  Actually, “glorified” is being a bit generous – electric space heaters are basically toasters that can’t even handle the simple task of making toast.  Their sole purpose in life is to consume as many kWh as they can get away with and not trip a circuit breaker in the process.  In my experience, they often fail even at this.  In the same way that you would not expect a toaster to keep your room at a constant 70 degrees (while also browning your morning bagel), it soon became obvious that the “thermostat” knob on my space heater contained the functionally of a particularly bland toddler toy.  And so I turned to HomeSeer.

The Solution

"Smart" Thermostat - powered by Z-Wave

“Smart” Thermostat – powered by Z-Wave

How to get one’s thermostat to control not only the furnace, but also one (or more) remote space heaters?  The amature electrician might do something like this, wiring the two directly together, but I didn’t want “wiring” – I wanted wireless.  So the geek instead turned to Z-Wave (a wireless home automation protocol) and HomeSeer (automation software), attached the space heater to a GE 45604 appliance module, and set up some events to define the relationship between thermostat and heater.  Because HomeSeer constantly receives information about the status of the thermostat (current temperature, set point, operating mode etc…), it was easy enough to use these conditions to tell the heater when to turn on or off via the Z-Wave module it was plugged into:

  1. If thermostat is “heating” –> Turn space heater on.
  2. If  thermostat is “idle” –> Turn space heater off.


Really.  It was that simple.  The beauty of this simplicity, is that changing the set point using the buttons on the thermostat would also affect the space heater – no extra programming needed.  However, there was still the issue of occupancy.  I didn’t always want the space heater sucking its 1.5kW just because it was less than 70 degrees.  The first step to solving this issue was easy enough:

3. If time is between 11:00pm and 6:00am –> Remain off.

That solved the problem for the night hours, but what about when I was away from home?  This required a bit of trickery requiring my Android smartphone and Tasker.  I created a profile in Tasker that would detect when the phone was connected to the home’s Wi-Fi network.  As long as it remained connected, it would run a python script (using SL4A) every 5 minutes that activated a virtual device in HomeSeer.  This acted as a sort of “dead man’s switch”, as HomeSeer would only register me as being home if the aforementioned virtual device had been triggered within the last 10 minutes:

4. If “At Home” is ON –> Allow heater to be turned on

Any glitch in the process would result in the heater turning off, rather than remaining on – a measure of safety.

The Results

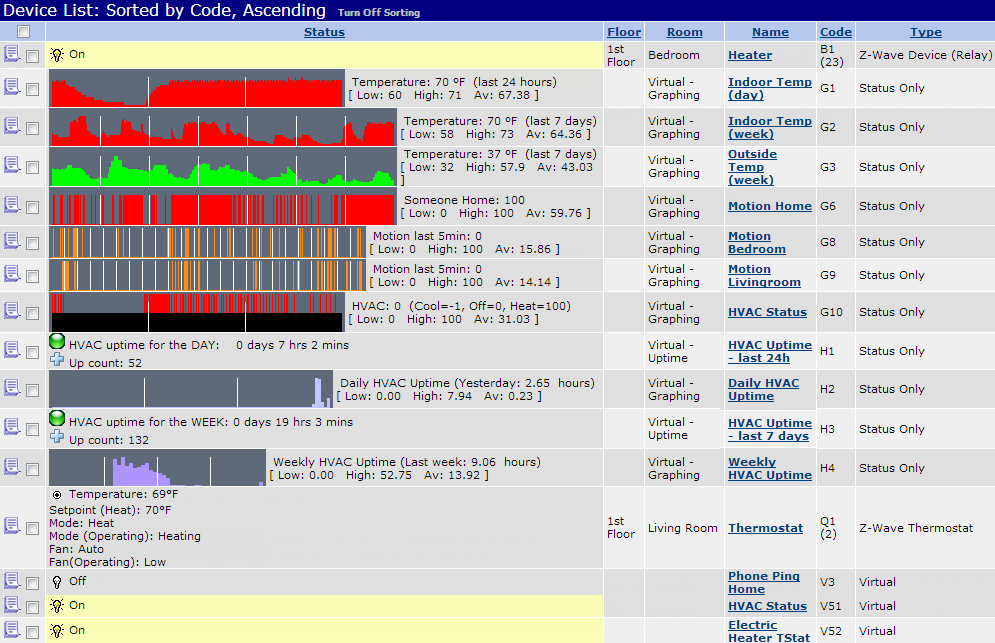
As you can see in the graphs below, this implementation allowed a very fine control of my room’s temperature – it fluctuates between 69 and 70 degrees just as it should with a set point of 70.

HomeSeer Interface with relevant devices displayed.

HomeSeer Interface with relevant devices displayed.

From the small amount of sensors in place – even if the 2 motion sensors are ignored – a wealth of data can be collected.  The room temperature for the past 24 hours can be displayed as a graph, as well as a comparison of outside versus inside temperatures from the past week (outside temp retrieved from online).  The total time the heater has been on during a given day or week can be logged, giving an accurate estimate of the electricity costs involved in running it.  I can also disable the bottom device, “Electric Heater TStat” if I want to temporarily unlink the two devices.

Hopefully this provides an interesting example of what can be done with even the most basic of Home Automation setups.  I’ll try to delve into this topic further in a later post; there are some really cool implementations of automation I’ve come across, as well as other “problems” of my own that I’ve managed to solve in interesting – if a bit over the top – ways.

Guide: Galaxy Nexus on PagePlus

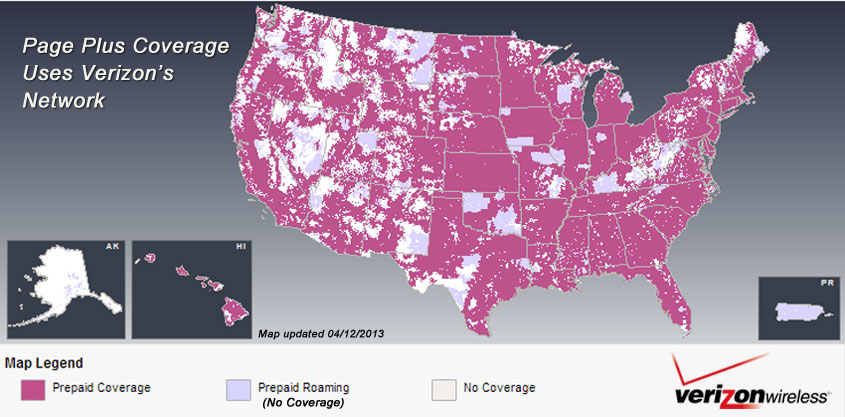
It was painful trying to find a simple, step-by-step walkthrough of how to flash a Verizon Samsung Galaxy Nexus LTE to PagePlus.  I was sick of the $60 wireless bill – unlimited data couldn’t even justify it anymore – and $27/mo for essentially the same coverage, more minutes and texts than any sane person needs (1200 and 3000, respectively), and 500MB on 3G was an easy pill to swallow.  Getting $400 for my unlimited data plan on eBay didn’t hurt, either.

Verizon's coverage with T-Mobile's pricing.  You can't lose.

Verizon’s coverage with T-Mobile’s pricing. You can’t lose.

The biggest hurdle lay in the fact that 4G phones such as the nexus aren’t officially supported.  A bit of work under the hood is required, so to speak, and the mechanics don’t come cheap.  Before I began the perilous task, I decided I’d document it and save the world a few hundred wasted hours of searching, reading and screwing up.  Here it is:

Prepare your PagePlus Account

  1. Register your phone with PagePlus.  I chose to go through Kitty Wireless, an authorized dealer, as they will take care of monthly billing with the 1200 Plan.  I’m also a member of the Level 2 “Crazy Kitty PIN Rebate Club ” which gives a discounted rate on plans – $26.97/mo vs $29.99/mo – it adds up over time, especially with multiple lines.  This club is only offered at select times during the year, and costs a one-time fee of $100 to join.
  2. Make sure to supply the MEID correctly when your register your device – you need to remove the last digit (because it is 4G capable) for the order to go through.  For example,mine was 990000xxxxxx223.  I supplied 990000xxxxxx22.  Should end up being 14 digits instead of 15.
  3. Wait for the order confirmation email.  You’ll need the following: Phone # (MDN) MIN (MSID), and SID.  For the SID, you need to call PagePlus at 800-550-2436.  Expect to wait a while.
  4. Make sure you have a Verizon 4G LTE SIM card.  If you want to be sure you won’t have trouble, get a new one.  Leave it out for now.  It makes things easier.

UPDATE: This guide (and all others) should get you at least 1X data on your Galaxy Nexus.  It is unlikely, if not impossible, that you will have 3G without the use of a donor phone.  I certainly did not.  If you wish to have 3G data, than there is an extra step:

5.  Acquire a donor phone.  This can be any Verizon dumbphone (that supports 3G) or any 3G ONLY smartphone.  You may already have one in a drawer somewhere.  If not, do a quick google search to make sure the one you are buying is compatible with DFS or CDMA Workshop.  I used a Samsung Convoy (SCH-u640).

Please read my guide for the donor process before continuing below.  You can always do this later, but you may have to repeat some of the below steps again.

Prepare your Computer

  1. Download this file (404MB).  It contains everything necessary for the process.
  2. Install the 32-bit or 64-bit Samsung USB drivers
  3. Install ETS
  4. Install Galaxy Nexus Toolkit (optional if you already have your phone rooted, bootloader is unlocked, and you have ClockworkMod recovery or similar installed)

Now…the Phone

Your nexus needs to have an unlocked bootloader.  I’ll cover that first, so if you’ve been using custom ROMs up to this point, you can skip to part 2.

Part 1 – Unlock the Bootloader

  1. Enable USB Debugging.  Settings –> About Phone –> Tap “Build Number” 7 times to enable the development menu.  Then go to it (Settings –> Development) and make sure Enable USB Debugging is checked.
  2. Turn off the phone.
  3. Enter FastBoot: While off, hold both volume buttons and the power button.
  4. Plug phone into computer and start Galaxy Nexus Toolkit.
  5. Select your phone (ie. option 36 for Android 4.2.2) then option 8 (1 CLICK FOR ALL). Use the recommended options and proceed through the prompts to unlock the bootloader (press VOL DOWN then POWER to unlock bootloader when asked).
  6. Proceed to install the ClockworkMod or TWRP recovery (your preference).
  7. The phone is now unlocked and rooted.

Part 2 – Flash to PagePlus

  1. Make sure the SIM card is removed.
  2. Copy the folder of necessary files you downloaded earlier onto your phone.
  3. Enter the bootloader (Power off, then Power + Volume Up button).
  4. Back up Everything.
  5. Wipe Data, System, Cache, and Dalvik-cache
  6. Install EOS rom, Gapps, toroplus-for-toro-FC12 radio
  7. WipeDalvik-cache and reboot.  Skip through all of the google registration / activation stuff.
  8. Unplug the phone from the computer, if it’s not already.
  9. Once loaded into the Android OS, do a full reset of all of your previous attempted programming, if any.  Dial *#*#786#*#* and set MSL to 000000, then choose reset.  Phone will reboot.
  10. Open the CDMA Tools app, swipe to the right and enable “USB Diagnostic Mode”
  11. Open the dialer, and type *#*#3282#*#*
  12. Edit –> Set MSL to 000000
  13. Others/More –> ETS Channel –> USB –> Ok
  14. Put the phone in Airplane Mode.  Plug it in to the computer.  Several VIA drivers should install (USB Hub, Modem, ETS).  If they don’t, try toggling USB Diagnostic Mode in CDMA tools.
  15. Start ETS Tools on your computer (Run as Administrator), and plug in the phone.  Look for the status to show it has connected, and that there are no errors:
    ETS Tools properly connected to the Galaxy Nexus

    ETS Tools properly connected to the Galaxy Nexus

  16. Go to Utilities –> Script Utility
  17. Open the script.txt from the files you downloaded.  Follow the instructions in the comments, replacing the first two items with the MDN (phone number), the next 3 with your MIN (MSID), and the remainder with your MDN.  The last replacement is the SID, which you had to call PagePlus to get.
  18. Copy the contents of the text file into the ETS script window, and hit Run.  Make sure no errors were reported.  If you get something like Code 1=HLP_ERR_ACTIVE_PARM_PROFILE_ID, Code 2=0x00000002, it may mean the drivers didn’t install correctly.  Also, try running as Administrator.
  19. Back in the CDMA Tools app, swype all the way to the right.  Change the directory from /data/media/ to /sdcard/ and flash the 52896 prl.
  20. Reboot to recovery.  Once again, wipe Data, System, Cache, and Dalvik-cache.  Flash your ROM of choice (Paranoid Android included in the files you downloaded), and install Gapps
  21. Last, install the i515 3g patch
  22. Power off, Install your SIM card (finally), Power on.
  23. Activate (*611) with PagePlus.  Then, dial *228, option 2 to update your PRL with Verizon.  Reboot.  Everything should be working: Voice, 3G Data, SMS, MMS.

Troubleshooting

INTF2 driver not installing – Install it manually via device manager – browse to C:\Program Files\SAMSUNG\USB Drivers\19_VIA_driver\amd64\VIA_USB_ETS and try the VIA ETS.

Driver for “Android 1.0” not found – choose Samsung Android Phone from the list.

Call PagePlus at (800) 550-2436 and verify your ESN / IMEI is correct and in their system.  I had mistyped a digit in mine, which is why this troubleshooting section exists and is is so long :/

3G not working?  Try this:

  1. Dial *#*#4636#*#*
  2. Select Phone Information
  3. Scroll down and change network type to CDMA auto prl
  4. Wait for few seconds…
  5. Reboot…
  6. Voila 3G will start

If all else fails…Nuke it from orbit.  Open up Galaxy Nexus Toolkit and do a full wipe and reflash to stock android (option 9).  It’ll undo all of the VZW programming (leave the sim out until you finish programming or it’ll try to reactivate your VZW sim information) and allow you a clean slate to start on.  Careful – this wipes EVERYTHING, including files on the “SD Card” partition.

Acknowledgments

As it turns out, dragonhart6505 has a great walkthrough detailing the process, but it is buried in pages of fluff over at XDA.  He was also generous enough to record a how-to on Youtube.  I borrowed heavily from his guide to write this, but still found some areas that required a bit of trial and error.  My goal was to have a clear guide I could come back to in the future if I had to do this again.

9c8337_25ef62e2e2f27eacb62ce16a1b0ee639 (1)

Interestingly enough, I actually went through this process back in the good old days with a Windows Mobile 6.5 HTC Touch Pro, switching it from Sprint to Verizon to take advantage of the lower price and better (non-crippled) specs of the Sprint version of the phone.  The process was just as convoluted as this one, and I somehow doubt the information even exists on how to do it again.  I certainly don’t remember, and didn’t have the foresight to document the process.  Fool me once…

Category: Technology | Tags: , , ,

Review: SD_Card_DVR

I was looking for a low cost Digital Video Recorder to save footage in real-time from the FPV camera on my Bixler 2.  I wanted decent video quality at 480p and a device that didn’t display a blue screen during signal loss, which often occurs when pushing range with wireless video.  Two commonly mentioned DVRs specifically for FPV include the FJ-DVR-SD4 from FPV Japan and the SD DVR from Hobbyking, costing $154.95 and $48.49, respectively.  The FPV Japan unit includes a screen to preview footage, but even still, both devices seem overpriced for the low-tech function they provide.  Recording input from a composite video source is very much 20th century.

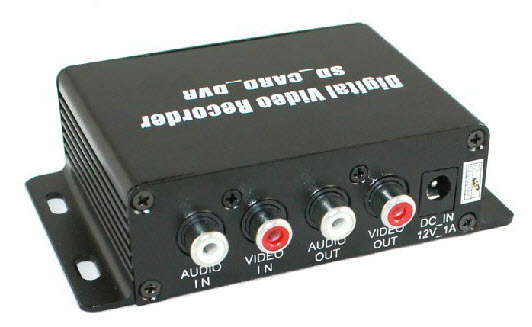
Inputs: Audio and Video in and out; 12V power

Inputs: Audio and Video in and out; 12V power

Enter the SD_Card_DVR, a no-brand device made in china and sold at various outlets under different names, including Dx.com (Mini Digital DVR Video Recorder w/ SD Slot), Amazon (Mini Sd Card Motion Detection Digital Video Recorder) and eBay (1 CH Mini CCTV Camera Audio/Video SD Card DVR).  There is also a blue-cased unit that likely runs the same firmware but uses combined A/V jacks instead of composite and a MicroSD slot instead of a full size.  Price for either is a more palatable $30-40.  Unfortunately, there were no reviews of this particular DVR to be found, so I decided to roll the dice and report my findings.

OSD

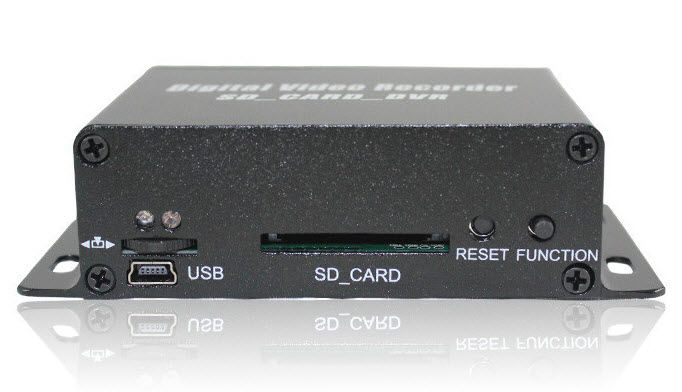
A simple on-screen display offers options to toggle between English and Chinese (default is Chinese; it’s the top menu item), NTSC or PAL recording, Recording mode (continuous, motion detection or mixed), and resolution (VGA or QVGA).  Menus are brought up with the function button, navigated with the rocker switch, and selected by pressing the rocker switch in – this took some trial and error to figure out – naturally, the supplied chinglish manual was of no help.

Controls and SD card slot

Controls and SD card slot

Once recording starts, the time is displayed for a few seconds, then there is an audible toggle and the video returns to pass-through mode, sending the signal straight through to the outputs without any change in quality.  Recording is still occurring when this happens, but in the “background” – this also took some figuring out.  The advantage of this is that there is no input lag – a must for FPV flying.

In my testing, I did notice that this DVR is rather sensitive to input voltage.  Specifically, if the voltage gets much below 12V (below about 11.5V, or 30% capacity), it will cease recording – and will even stop passing through video to the outputs.  If powering this with a battery, I’d use a high capacity 3S lipo and try to keep it above 50% capacity, or use a 4S lipo with a 12v step down board.

In continuous recording mode, the DVR will break up the recordings into 30 minute sections.  Once the SD card fills up, it will automatically erase the oldest file and replace it with the current recording – not really needed for my current task, but absolutely mandatory for video surveillance purposes.

Recording

There are two recording settings:VGA or QVGA, both encoded in MJPG.  These settings can be further refined, but you must do so by placing a properly-formatted “system.txt” file on the SD card.  That file should contain only 7 characters, for example: F15V0S9, where F = Framerate (0-30; default 15), V = video system (default 0 for PAL .. change to 1 for NTSC), and  S = sensitivity (0-9; default 9).  On the next boot, the new settings will be loaded and you can then delete the file.

Interestingly, the default 480p settings had the framerate set at 15fps.  Long story short, it is best to keep it there.  While you can increase it up to 30, the bitrate remains the same, resulting in a lower quality recording from attempting to encode twice the data without an increase in file size.  I found no way to adjust the bitrate, other than switching between VGA and QVGA.  Below is the file info for the 3 settings I tested (click to expand):

VGA: 640x480 (30fps)

Type: AVI
Video: MJPG 640×480 30fps [Stream 00] Audio: PCM 8000Hz mono 128kbps [Stream 01]

General
File name : 2013-07-04 00-36-46-C.AVI
Format : AVI
File size : 446 MiB
Duration : 14mn 11s
Overall bit rate : 4388 Kbps
Writing application : ankarec

Video
ID : 0
Format : JPEG
Codec ID : MJPG
Duration : 14mn 11s
Bit rate : 4254 Kbps
Width : 640 pixels
Height : 480 pixels
Display aspect ratio : 4:3
Frame rate : 30.000 fps
Color space : YUV
Chroma subsampling : 4:2:0
Bit depth : 8 bits
Compression mode : Lossy
Bits/(Pixel*Frame) : 0.462
Stream size : 432 MiB (97%)

Audio
ID : 1
Format : PCM
Format settings, Endianness : Little
Format settings, Sign : Signed
Codec ID : 1
Duration : 14mn 11s
Bit rate mode : Constant
Bit rate : 128 Kbps
Channel(s) : 1 channel
Sampling rate : 8 000 Hz
Bit depth : 16 bits
Stream size : 13.0 MiB (3%)
Interleave, duration : 500 ms (15.01 video frames)

VGA: 640x480 (15fps)

Type: AVI
Video: MJPG 640×480 15fps [Stream 00] Audio: PCM 8000Hz mono 128kbps [Stream 01]

General
File name : 2013-07-03 22-47-26-C.AVI
Format : AVI
File size : 492 MiB
Duration : 16mn 36s
Overall bit rate : 4144 Kbps
Writing application : ankarec

Video
ID : 0
Format : JPEG
Codec ID : MJPG
Bit rate : 4013 Kbps
Width : 640 pixels
Height : 480 pixels
Display aspect ratio : 4:3
Frame rate : 15.000 fps
Color space : YUV
Chroma subsampling : 4:2:0
Bit depth : 8 bits
Compression mode : Lossy
Bits/(Pixel*Frame) : 0.871
Stream size : 477 MiB (97%)

Audio
ID : 1
Format : PCM
Format settings, Endianness : Little
Format settings, Sign : Signed
Codec ID : 1
Duration : 16mn 36s
Bit rate mode : Constant
Bit rate : 128 Kbps
Channel(s) : 1 channel
Sampling rate : 8 000 Hz
Bit depth : 16 bits
Stream size : 15.2 MiB (3%)
Interleave, duration : 500 ms (7.50 video frames)

320x240 (15fps)

Type: AVI
Video: MJPG 320×240 15fps [Stream 00] Audio: PCM 8000Hz mono 128kbps [Stream 01]

General
File name : 2013-07-03 23-25-20-Q-C.AVI
Format : AVI
File size : 163 MiB
Duration : 11mn 0s
Overall bit rate : 2071 Kbps
Writing application : ankarec

Video
ID : 0
Format : JPEG
Codec ID : MJPG
Duration : 11mn 0s
Bit rate : 1940 Kbps
Width : 320 pixels
Height : 240 pixels
Display aspect ratio : 4:3
Frame rate : 15.000 fps
Color space : YUV
Chroma subsampling : 4:2:0
Bit depth : 8 bits
Compression mode : Lossy
Bits/(Pixel*Frame) : 1.684
Stream size : 153 MiB (94%)

Audio
ID : 1
Format : PCM
Format settings, Endianness : Little
Format settings, Sign : Signed
Codec ID : 1
Duration : 11mn 0s
Bit rate mode : Constant
Bit rate : 128 Kbps
Channel(s) : 1 channel
Sampling rate : 8 000 Hz
Bit depth : 16 bits
Stream size : 10.1 MiB (6%)
Interleave, duration : 500 ms (7.50 video frames)

I uploaded a short recording to Youtube to exemplify the degraded quality when going from 15 to 30 fps:

Other features

Recording starts as soon as power is supplied to the device, and ends when it is disconnected.  There seems to be a capacitor inside that allows for a safe shutdown after power is removed and thereby avoiding file corruption.  The SD_Card_DVR handled both a generic-brand 8GB microSD card inside an adapter as well as a PNY 16GB SD card, both  formatted to FAT 32.

As I mentioned at the start, there is a blue version of this DVR that appears to be identical in all but the input connectors and microSD slot.  Unlike my unit, some enterprising merchant actually bothered to make a demo video for the blue one:

http://youtu.be/VPN42m3xtmo

Conclusion

The SD_Card_DVR proved itself a worthy addition to my FPV gear, and has faithfully been recording flights ever since:

I’m satisfied with the features and quality (at 15fps) of this DVR.  It certainly works well enough to help me trace down my plane if it should crash out of view.  For $30, I don’t think it can be beat, and the continuous loop recording is a great feature that is often annoyingly absent on similar cheap DVRs.  For $10-20 more, however, I think the HobbyKing DVR might be a better bet if quality is a priority – I’d imagine its performance at 30fps is superior, and it has a remote.

Going Paperless

In the 20 years that I have been a student, I have always had a backpack.  I was never in want of a place to stow a binder, pockets for extra pens and highlighters, and still more compartments for snacks, a laptop, umbrella, and the various tools, trinkets and gadgets that I might (never) need to use.

Well, I’m still a student, but now I have only two pockets in a short white coat to assume the place of my trusty pack.  Suddenly, I have become over-encumbered with what would have in the past only been only a moderate load.  It wasn’t too difficult to boot the umbrella and trinkets from my cargo manifest, but the nature of the true culprit quickly became obvious: paper.  I hate paper.  It has been only three weeks since I have been forced to accelerate the demise of this pulpy, archaic medium, but I am happy to declare that progress has been made.

Looking back, it’s scary how dependant I was on 19th century (and older) technology for organizing my life.  Because of its insidious creep into every nook of my routine, there was no single solution to ridding myself of those stacks of ugly scrawl, often labored over for hours only to be buried under an unstable tower of their brethren and forgotten.  Yet slowly I have succeeded in reducing – if not eliminating – my dependance on parchment.  Here is what I have used to accomplish the task:

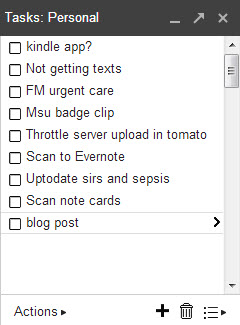
Notepad / Scrap paper: Google Tasks

Google Tasks open in Gmail

Google Tasks open in Gmail

Google Tasks is the best tool for anyone integrated into the google ecosystem, as it is quickly accessible from gmail.  I leave it enabled in the bottom right corner of my screen, and have lists for To-Dos, personal notes, long term reminders, and tasks specific to certain occupations, organizations or activities.  These liste are instantly synced across all of my computers, as well as my android phone (app: GTasks) and iPad (app: GoTasks).  There is a checkbox to mark a task complete, and you can also set reminders and due dates.  Say goodbye to sticky notes and that pile of cut-up recycle paper you used to keep on your desk.

Filing Cabinet: Evernote

Evernote Web Clipper browser plugin

Evernote Web Clipper browser plugin

Evernote occupies that second tier of notes – those that aren’t tasks or items to be remembered for a short time later, but rather all of those pesky little details in life that need to be remembered.  That combination for the bike lock that you always forget in the spring?  You know, the one you wrote down….somewhere?  Yup, evernote will take care of it.  Along with longer items such as notes, pictures and even audio recordings.  You’re limited to 100MB of uploaded stuff per month, so plan on paying for the premium account if you do much of the latter.  For text and the occasional picture / scan, it’s plenty. The web clipper browser plugin is also essential for saving interesting/funny things you read online.  Storing them in evernote solves the issue of trying to find them later only to realize the content was pulled, the site offline, or you just plain forgot where to look.  Of course, like Google Tasks, Evernote is available on the desktop, web, and mobile platforms, so your filing cabinet is always with you.

Scrawl: Penultimate

penultimateI use this app on the iPad for those rare situations in which you simply need to write.  The resolution and accuracy of a capacitive stylus leaves much to be desired, but it works in a pinch.  Samsung’s Note line of phones/tablets, as well as many Windows tablets such as MS Surface, have Wacom digitizer hardware, allowing the use of a proper stylus for better accuracy and ease of use.  Still, my 9″ iPad mini is about as good as a 3×5 paper notecard as far as the amount I can fit on a page.  On the plus side, it syncs to Evernote – a feat that leaves the note card feeling quite resentful and unwanted.  Good riddance.


Binders: Dropbox

Dropbox or Google Drive, you can have your pick.  Either of these are great for storing vast archives of created content or school/work documents and keeping them synced across all your devices.

Flashcards: Anki

I already wrote in length about Anki.  In short, if you have a pile of things to memorize and retain for any significant amount of time, there’s nothing better.

Textbooks: PDF

It’s amazing how many things you can find online if you dig a bit.  And by digging, I actually mean a simple google search.  If you’re lucky enough to find a decent quality PDF of the textbook you need, I still think Adobe Reader is the best app for the job (perhaps with the exception of PDF X-Change Viewer on a Windows machine).  Sadly, the CHM format is still used frequently, and it necessities using apps that are generally more buggy and less polished.

Books / Novels: Calibre and ePub

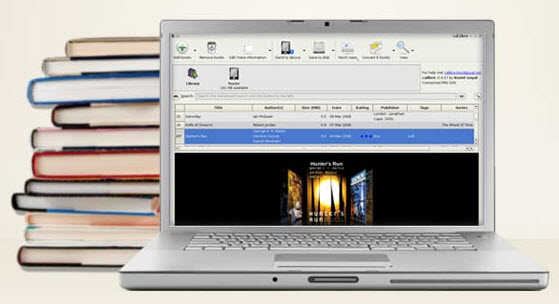
Calibre is an awesome piece of software for managing an eBook library for use with dedicated eReaders, tablets or phones.  Not only will it organize and convert your library of digital books, but it can also act as a server to allow those books to be accessed from anywhere if you happen to have a computer you can leave running all the time.  My favorite apps that support the ODPS protocol that Calibre uses as well as the widely-used ePub format for eBooks are FBReader on Android and Marvin on the iPad.

calibre


With the above tools, as well as a capable PC, smartphone and tablet, you have all that’s needed to leave paper behind in the last century where it belongs.  If you still find yourself having to use it from time to time, I think you would be well served by adding two more items to that list: a scanner and document shredder.

fapjunk