Tag Archives: Tasker

Space Heater Controlled by Z-Wave Thermostat

A Case Study in Home Automation

In lieu of actually writing a more comprehensive post about my foray into home automation, I decided to begin instead with something more simple: a problem, and its overly-complicated, but totally awesome solution.

My bot-so-smart source of warmth.

My not-so-smart source of warmth.

I currently depend on this heater to keep my basement dwelling habitable.  While the furnace that heats the upper levels sends a token amount of semi-warm air in my general direction, it doesn’t seem too concerned with my comfort.  So, like most people in this situation, I use a glorified toaster to stave off hypothermia.  Actually, “glorified” is being a bit generous – electric space heaters are basically toasters that can’t even handle the simple task of making toast.  Their sole purpose in life is to consume as many kWh as they can get away with and not trip a circuit breaker in the process.  In my experience, they often fail even at this.  In the same way that you would not expect a toaster to keep your room at a constant 70 degrees (while also browning your morning bagel), it soon became obvious that the “thermostat” knob on my space heater contained the functionally of a particularly bland toddler toy.  And so I turned to HomeSeer.

The Solution

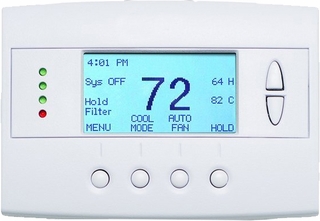
"Smart" Thermostat - powered by Z-Wave

“Smart” Thermostat – powered by Z-Wave

How to get one’s thermostat to control not only the furnace, but also one (or more) remote space heaters?  The amature electrician might do something like this, wiring the two directly together, but I didn’t want “wiring” – I wanted wireless.  So the geek instead turned to Z-Wave (a wireless home automation protocol) and HomeSeer (automation software), attached the space heater to a GE 45604 appliance module, and set up some events to define the relationship between thermostat and heater.  Because HomeSeer constantly receives information about the status of the thermostat (current temperature, set point, operating mode etc…), it was easy enough to use these conditions to tell the heater when to turn on or off via the Z-Wave module it was plugged into:

  1. If thermostat is “heating” –> Turn space heater on.
  2. If  thermostat is “idle” –> Turn space heater off.


Really.  It was that simple.  The beauty of this simplicity, is that changing the set point using the buttons on the thermostat would also affect the space heater – no extra programming needed.  However, there was still the issue of occupancy.  I didn’t always want the space heater sucking its 1.5kW just because it was less than 70 degrees.  The first step to solving this issue was easy enough:

3. If time is between 11:00pm and 6:00am –> Remain off.

That solved the problem for the night hours, but what about when I was away from home?  This required a bit of trickery requiring my Android smartphone and Tasker.  I created a profile in Tasker that would detect when the phone was connected to the home’s Wi-Fi network.  As long as it remained connected, it would run a python script (using SL4A) every 5 minutes that activated a virtual device in HomeSeer.  This acted as a sort of “dead man’s switch”, as HomeSeer would only register me as being home if the aforementioned virtual device had been triggered within the last 10 minutes:

4. If “At Home” is ON –> Allow heater to be turned on

Any glitch in the process would result in the heater turning off, rather than remaining on – a measure of safety.

The Results

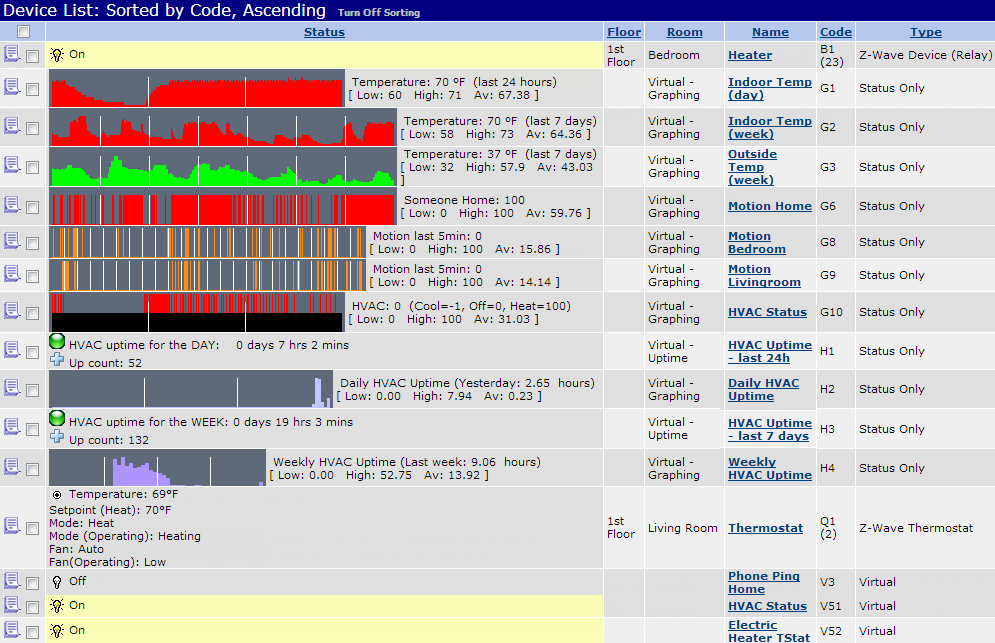
As you can see in the graphs below, this implementation allowed a very fine control of my room’s temperature – it fluctuates between 69 and 70 degrees just as it should with a set point of 70.

HomeSeer Interface with relevant devices displayed.

HomeSeer Interface with relevant devices displayed.

From the small amount of sensors in place – even if the 2 motion sensors are ignored – a wealth of data can be collected.  The room temperature for the past 24 hours can be displayed as a graph, as well as a comparison of outside versus inside temperatures from the past week (outside temp retrieved from online).  The total time the heater has been on during a given day or week can be logged, giving an accurate estimate of the electricity costs involved in running it.  I can also disable the bottom device, “Electric Heater TStat” if I want to temporarily unlink the two devices.

Hopefully this provides an interesting example of what can be done with even the most basic of Home Automation setups.  I’ll try to delve into this topic further in a later post; there are some really cool implementations of automation I’ve come across, as well as other “problems” of my own that I’ve managed to solve in interesting – if a bit over the top – ways.

Saving Battery with Tasker

Posted on by 1 comment

The Galaxy Nexus is notorious for its mediocre battery life, especially when operating in an area with marginal 4G coverage.  Finding that my phone would frequently attempt to maintain a cellular data connection even while not being used, I decided to remedy the issue with BattSaver, my creatively-named Tasker profile designed to minimize power usage from the phone’s radios while not in use.

Components

BattSaver comes in 4 parts, either due to necessity or my own inefficiency.  Still, it is quite simple, and the results speak for themselves.

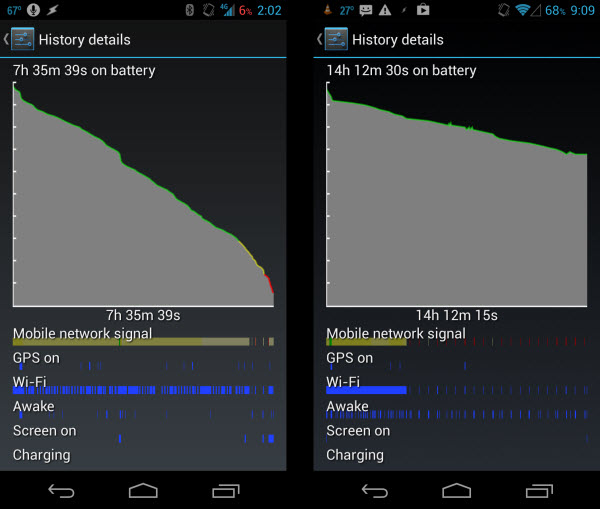
Left: Samsung Galaxy Nexus LTE failing || Right: Running BattSaver Tasker profile

Left: Samsung Galaxy Nexus LTE failing at being a phone || Right: Improvement with BattSaver activated

There are many of these profiles out there, such as this one on XDA, but I found them to be  either too complex or overly rigid.  While one can attempt to plan for every usage scenario, it eventually becomes so burdensome and inefficient to do so that the whole point of automation is lost.  I don’t, for instance, want to manually add every Wi-Fi network I use to the profile so that it can trigger when away from home.  This is an inconvenience, but worse, it is inflexible.  What if I go on a trip, or change my routine?  I do not want to have to manually update my phone to keep the task working.

Here, as with most things, I’m a fan of the KISS (keep it simple, stupid!) principle.  My profile may not have as many functions, but it is predictable.  BattSaver requires no attention aside from enabling or disabling it, and is –  I’ll bet – at least 90% as effective.

So, back to the 4 components:

Batt Saver Trigger

This profile checks to see that the phone is not in use, as defined by the following conditions:

  • Screen is OFF
  • Charger is disconnected
  • Phone is not at home

If these are met, Batt Saver will activate.  You can also set a minimum percentage the battery must reach before the profile engages – I typically use 25%.

Batt Saver

This is the main profile, which enables airplane mode as long as the above conditions remain met, and no phone calls are ongoing.

Battery Status

This maintains a variable (%BATTLVL) to monitor the battery percentage and use it as a condition in Batt Saver Trigger.

Batt Check

Finally, we need a way to periodically check for messages and email while the battery saver is running.  This turns the radios on every 30min by interrupting Batt Saver for one minute – enough time to connect and send/receive data.

Profiles

As usual, here is a zip of the profiles and tasks if you wish to import them.  Aside from Tasker, you will also need the free version of SecureSettings installed.

The only modification you will need to make is to change or remove the condition in Batt Saver Trigger that checks if the phone is at home.  I use a variable that is set by another profile that monitors the nearby WiFi and Cell towers, so you can either create a similar profile and have it change the %AT_HOME variable (1=yes, 0=no), use a different condition, or just delete it.

Category: Technology | Tags: , , , , ,

Bluetooth Trigger for Dash-Cam

Last week, I wrote about my experience using an old Droid X as a dash-cam, Russia-style. With Tasker and DailyRoads Voyager, the implementation allowed for completely hands-off operation; recording video only when the car was on.  The only issue was that I had needed to use the power source as the trigger for letting Tasker know when the car was operating.  This was fine until Winter struck here in Michigan, spelling doom for the battery, even with Airplane mode engaged.

I had the capability to run continuous power to the phone from the car’s own battery, but then what would trigger Tasker?  I had thought about trying to make something work with the GPS, or even a relay, but each had its pitfalls or inconsistencies.  Fortunately, Slickdeals offered a solution to the problem when Best Buy held a fire-sale for the Rocketfish Bluetooth Speaker for iPad.  $5 you say?  I’ll take 3!

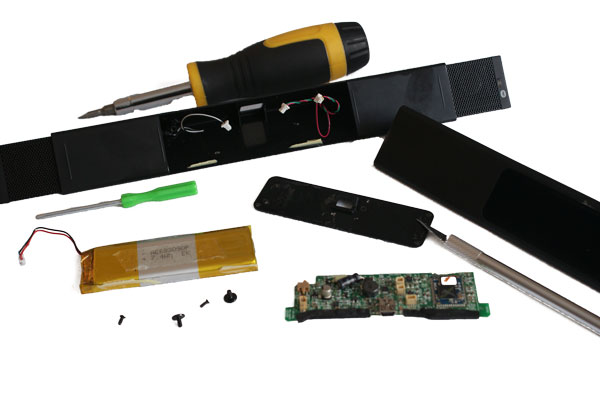
A bit of dis-assembly later, and I was left with this:

Disassembly required.

Disassembly required.

Now, there is nothing too special about this specific product.  I imagine any Bluetooth audio device – including headsets – would work for the task, provided that it do three things:

  1. After removing the included battery, it must still power up and attempt to connect when USB power is attached.
  2. Pairing settings must be saved when power is removed – despite the lack of battery.
  3. If you decide to leave the battery attached, it must still power down immediately after power is removed, without any button presses required.


I suspect many Bluetooth devices will meet these requirements, but I can only vouch for the one I tried.

bt_adapter

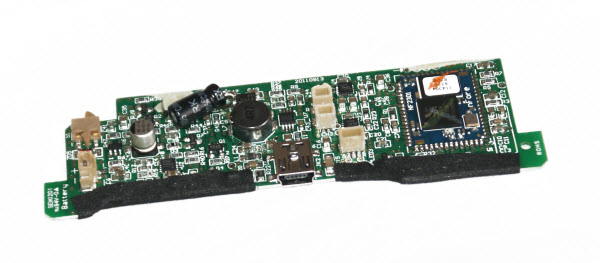
Bluetooth audio receiver module, Rocketfish RF-TRSPIPAD

So, once you have the board and are satisfied that it will function properly, it must be connected to a USB car adapter that powers on/off with the car.  Pair the phone up with the Bluetooth device, and create a Tasker profile to start DailyRoads Voyager when a pairing is made.  I have made my profile available below.


And it’s as simple as that.  No more dead batteries, and everything works just as well as before.  I noticed no lag at all in detecting the Bluetooth connection, even after days of it being powered off.  It is also worth mentioning that there has been no noticeable impact on the car’s battery, despite the phone running all the time with the radios on (but screen off).

100% hands-off operation, working flawlessly.

100% hands-off operation, working flawlessly.

Android Dash-Cam DIY

Premise

The gadgets in my car have been through a number of iterations, from TomTom running on an old Windows Mobile 6 phone, to a full-fledged, Windows 7 based CarPC complete with touchscreen, GPS and Bluetooth OBD-II data monitoring.  These were fun projects, and may be worth a future post.  Sadly, each had a number of flaws, and have since been replaced with a much simpler android setup.

droid_dvr_profile

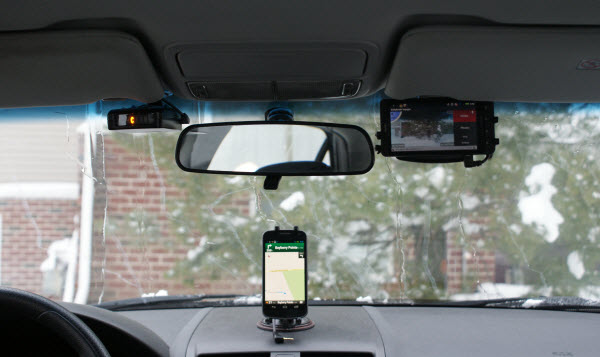
My current electronics suite: a Droid X and a Whistler XTR-150 Laser/Radar Detector

Having no better use for my retired Motorola Droid X, I decided to re-purpose it as a dedicated Car DVR after watching one too many YouTube videos involving Russian motor vehicle accidents.  Why does a former superpower dominate this genre of video clips?  Surprisingly, Russia does not top the statistics when it comes to fatal motor vehicle accidents (the Middle East seems to dominate that field) and while they place a respectable 4th in alcohol consumption per capita, this by itself doesn’t seem to explain the need for meticulous video record-keeping of one’s daily commute to work.

Of course, the reason most of us keep records usually has something to do with taxes and the law, and it is no different here.  Apparently, the legal atmosphere on Russia’s roads is very much one of guilty-until-proven-innocent.  With widespread corruption, hit-and-runs, and the general dearth of witnesses, the Dash-Cam is a technological last hope for innocent drivers who are tired of being taken advantage of by accident-staging and bullying.

http://www.youtube.com/watch?v=fA1ljLtL5Hs

Here in Michigan, its more just for fun – although you never know when having footage on hand may prove useful.  So, how do you turn an old android smartphone into an automated, HD-video-shooting piece of awesomeness?

Set-up

1) The phone.  Generally, any android phone will do for this, though you will want to be sure the camera placement is in a suitable location so as not to be blocked by the mount.  I’d aim for something that records in at least 720p, such as the Droid X, 1st-gen Galaxy S, or HTC Rhyme/Incredible/Desire.  A MicroSD slot is also highly recommended.

2) Get a mount.  I used this one from Arkon.  It is universal, cheap, and (aside from coming lose on a hot day), dependable.  This may be a better option, depending on where your camera is located.

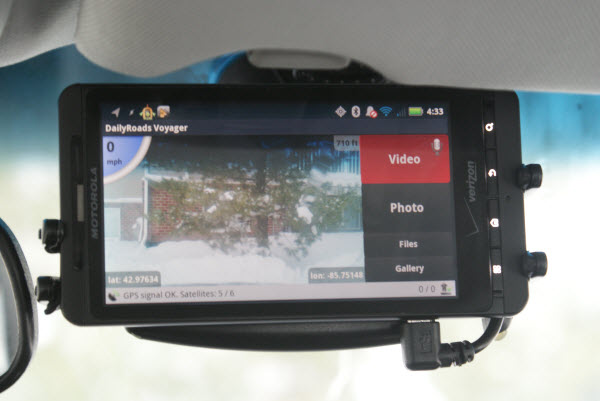
droid_dvr_close

3) Time to go shopping…at the Play Store.  You’ll need DailyRoads Voyager (free) and Tasker ($6.49).  Optionally, you can add (all free) Orientation ControlNo Lock, MyTracks (and its Tasker plugin), and Quick Boot to log GPS tracks and keep the screen unlocked and in landscape mode.  Rooting your device will unlock some extra functionality with Tasker, but isn’t strictly necessary for the task at hand.

4) Power.  You need a power source from your car to charge the phone.  It must only supply power when the car is on (most outlets do this).  A cheap car adapter will do, or you can get a bit more creative and splice in the wiring so as to conceal the wiring and make things look more professional.

5) Configuration.  Set up DailyRoads to automatically record (I like 5min clips) when launched.  Make sure to go through the rest of the settings and tweak them to your needs and the capabilities of your device.  Ensure the GPS data is logged in .srt format, as this will allow it to be overlayed on the video as subtitles when playing back on your PC with VLC or similar.

For Tasker, you’ll need it to launch DailyRoads (and MyTracks) when the car is powered on (charging), and kill it when power is removed, as well as switch to airplane mode to conserve battery.  Tasker can be a bit daunting the first time you open it up, but there are many guides online that walk you through its array of functions.  In addition, I have shared my profiles here, an you may import and modify them to suit your purposes.


That’s it!  Your Android Dash-Cam will now start and stop recording in tune with your driving, no input required.

Issues

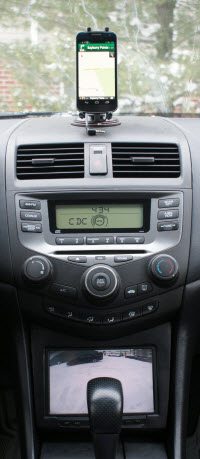
car_lower_dash Having had this setup running for a bit over a half of a year, my biggest issue remains that of battery life.  Despite the power savings afforded by Airplane mode, I still find myself having to charge the phone manually about once per week, especially in the winter.  Ideally, I’d just run a cable to the phone that is always powered by the car’s battery – the small drain shouldn’t pose a threat to the car.  However, the issue here is that Tasker depends on the charging status to know when you’re driving. One idea is to use the GPS to measure speed, and have that trigger Tasker.  In my set-up though, the GPS is turned off with the car to save power, and even if I were to leave it on, I’m not confident that it would reliably maintain a fix for days on end.

That leaves Bluetooth and Wi-Fi as the only other input options.  I’m thinking of using a Bluetooth device  powered by the car to trigger the event when it connects to the phone.  When the car turns off, it will lose power, disconnect, and thus Tasker will know to stop the recording.  I’ll try to give both these options a fair shot in the next few weeks, and will report back if successful.

Category: Technology | Tags: , , , , , , , ,
fapjunk